If you’re wondering how to add checkboxes in Notion tables, you’re not alone.
I used to grapple with disorganized data until I found my secret weapon: checkboxes. These humble tools transformed my tables, bringing order to chaos.
In this guide, I’ll share my easy five-step process for adding checkboxes to your tables. Let’s turn those challenges into satisfying checks together. Ready to begin?
What We Will Cover
Notion Tables, A Rehash
I use Notion tables all the time and call them my digital Swiss Army knife. They handle data like spreadsheets, but with a twist.
With them, you can add not just text, but also formulas, dates, links, multi-selects, and yes, even checkboxes! You can customize them just like a database with a few simple clicks.
If you’re planning a project, tracking tasks, or just keeping tabs on stuff, they are the perfect tool.
What Is The Checkbox Function In Notion?
The checkbox function in Notion is a common feature you’ll find to-do lists, checklists, and tables.
Simply insert a checkbox property in your Notion page, and you can easily mark items as complete by ticking the box.
This function is perfect for organizing your daily tasks, managing projects, or even creating a grocery list.
3 Ways Checkboxes Can Make Your Notion Life Better
Drowning in tasks and data?
Discover the power of checkboxes in your workspace! These humble checkboxes can skyrocket productivity and supercharge team collaboration.
Here are 3 ways to turn them into your secret weapon in Notion tables.

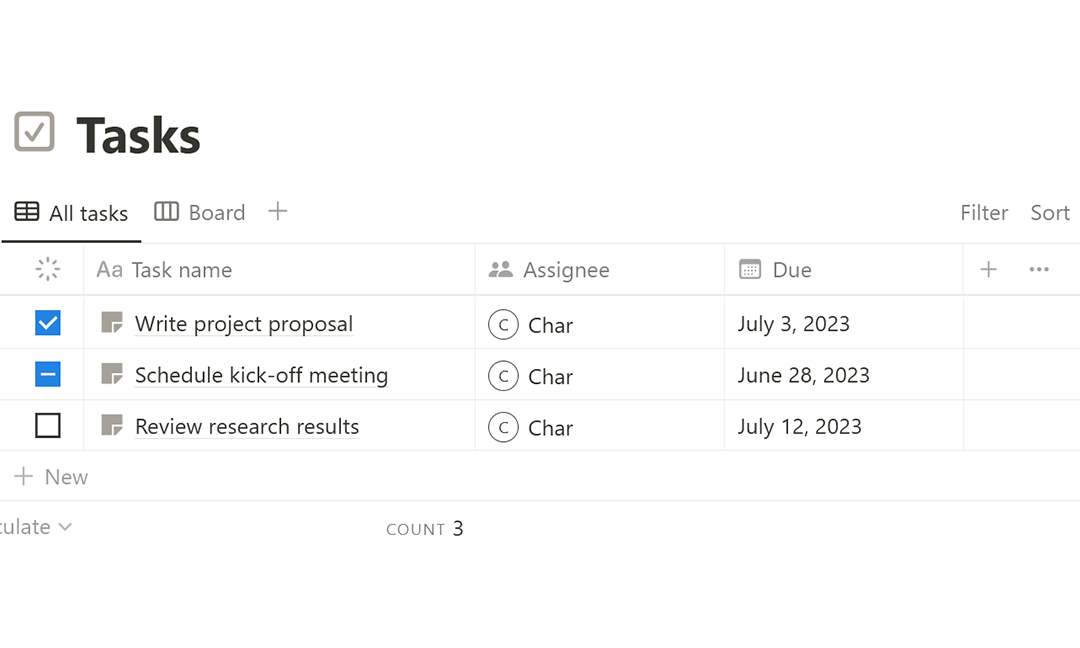
1. Keep Track of Tasks
Why should you add checkboxes in Notion tables? To track tasks, of course! Check off complete tasks, and watch your productivity skyrocket.
I use this religiously for project managing projects, and I’ve even started using it personally for my habit tracker.
The bottom line: checkboxes = life organized, one satisfying check at a time. Less craziness and your to-do list will thank you.
2. Data Filtering
Sorting & Filtering: the unsung hero of Notion Tables. It’s the mastermind behind organizing chaos.
With a simple checkbox, you can sort and filter your data. Want to see which items meet certain criteria? Check! Need to know which tasks need tackling? Check!
By adding checkboxes, you can quickly organize information and stay on top of your work.
3. Upvoting
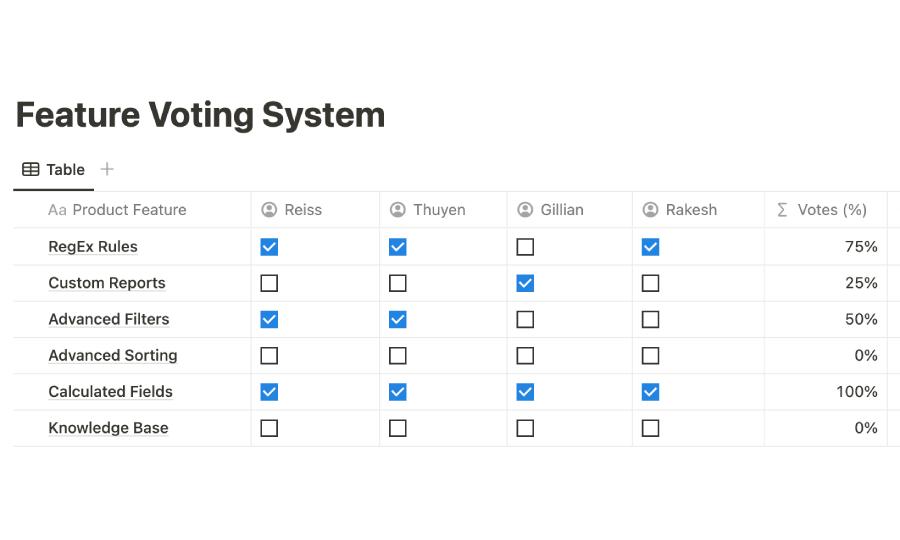
Checkbox upvoting in Notion tables is super useful, especially in team settings. I use it to prioritize developing features for my SAAS project, making collaboration easy.
In my previous article, I extensively explained upvoting. (Link below if you’re interested.)
Notion Upvote: 2 Workarounds You Can Implement Now
But it isn’t just for feature development; use it to collect valuable feedback too. Upvoting helps prioritize ideas, making collaboration smoother and more efficient.
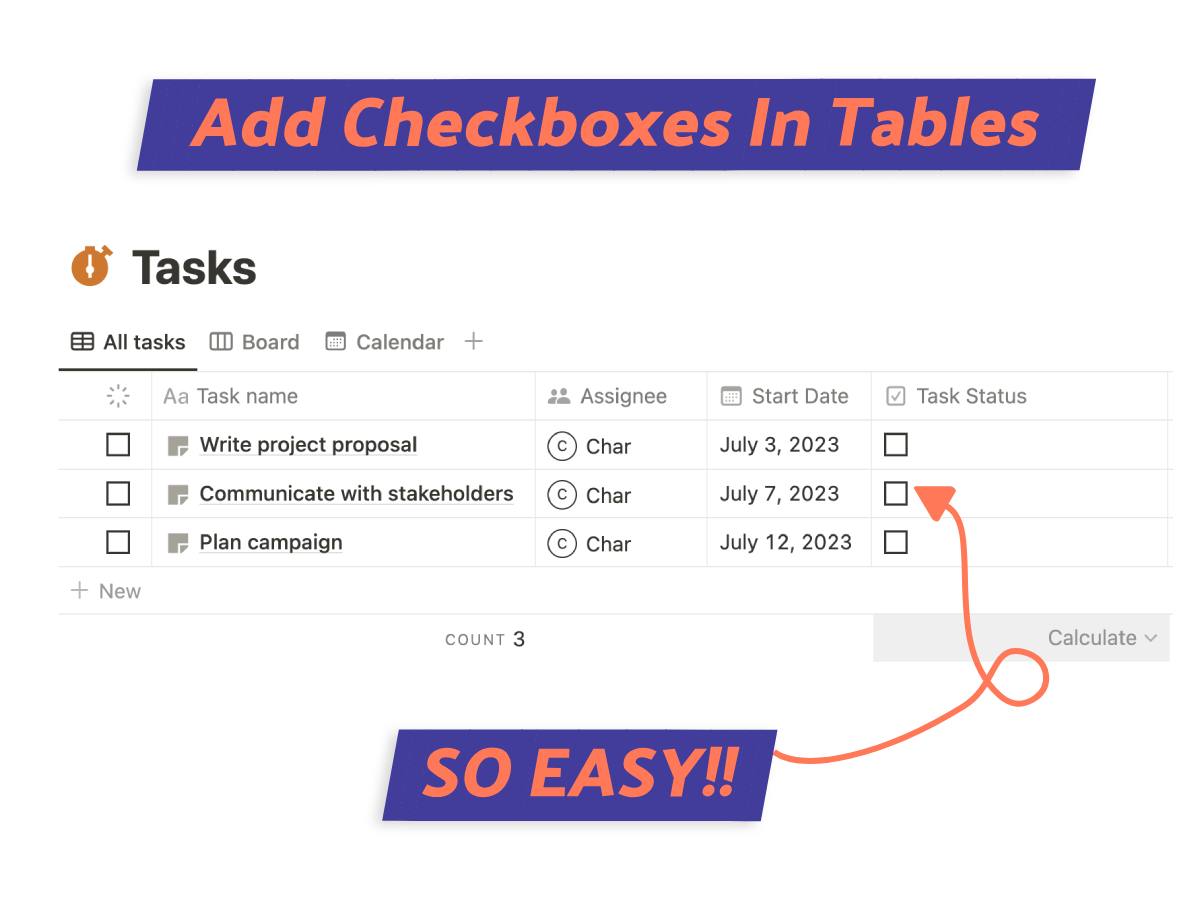
How To Add Checkbox In Notion Table
Unsure how to add checkboxes in Notion tables? Our clear, step-by-step guide is here to help.
Whether for task tracking or any other creative use, these checkboxes can transform your productivity.
Step 1: Creating or Opening a Table
To add a checkbox in a Notion table, first, navigate to the table where you want to add the checkbox.
This could be an existing table you’ve already created or a brand new one. Either way, locating the right table is your crucial first step.
Step 2: Add A Property
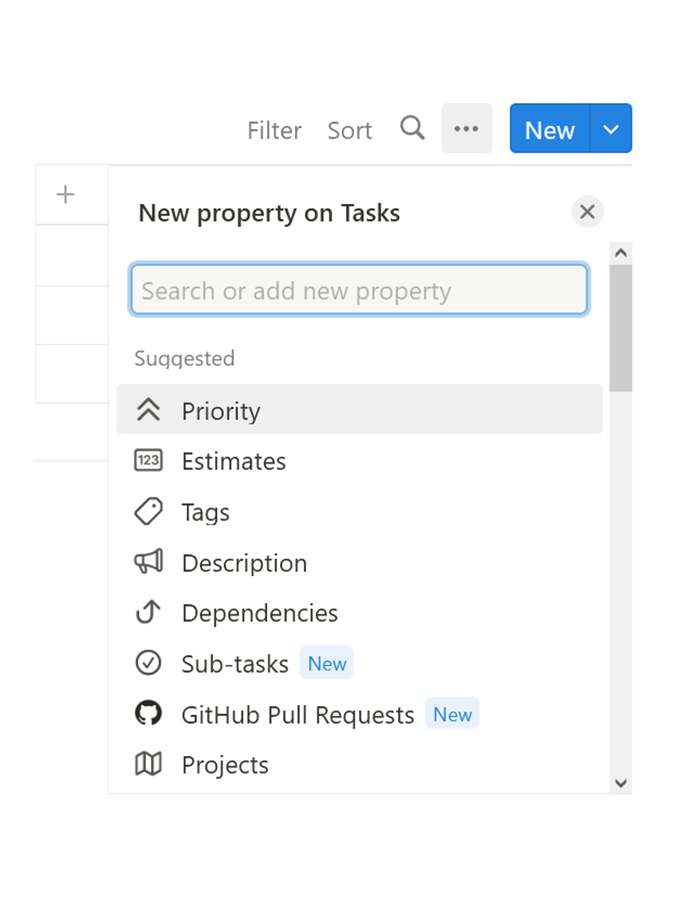
Let’s add a column to your Notion table.
To do this, simply click on the “+ Add a property” option at the top of your table. This new column is where your checkboxes will go.
Step 3: Name Column
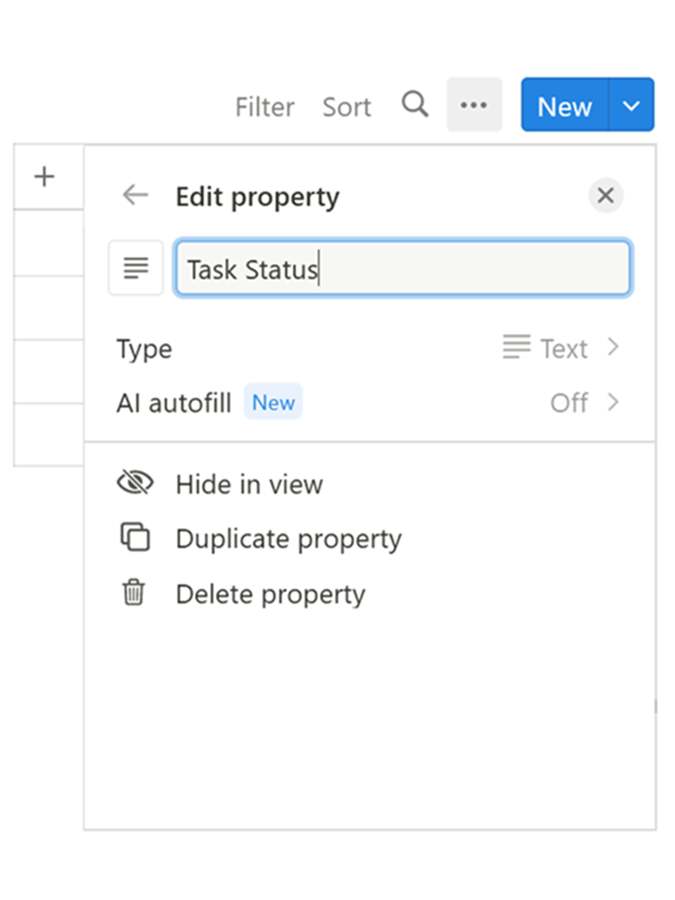
Don’t forget to name your column. Type in the name you want for your column, making it clear and easy to understand.
For instance, you could choose something like ‘Task Status.’ Remember, short and simple names work best.
Step 4: Select “Checkbox” Option
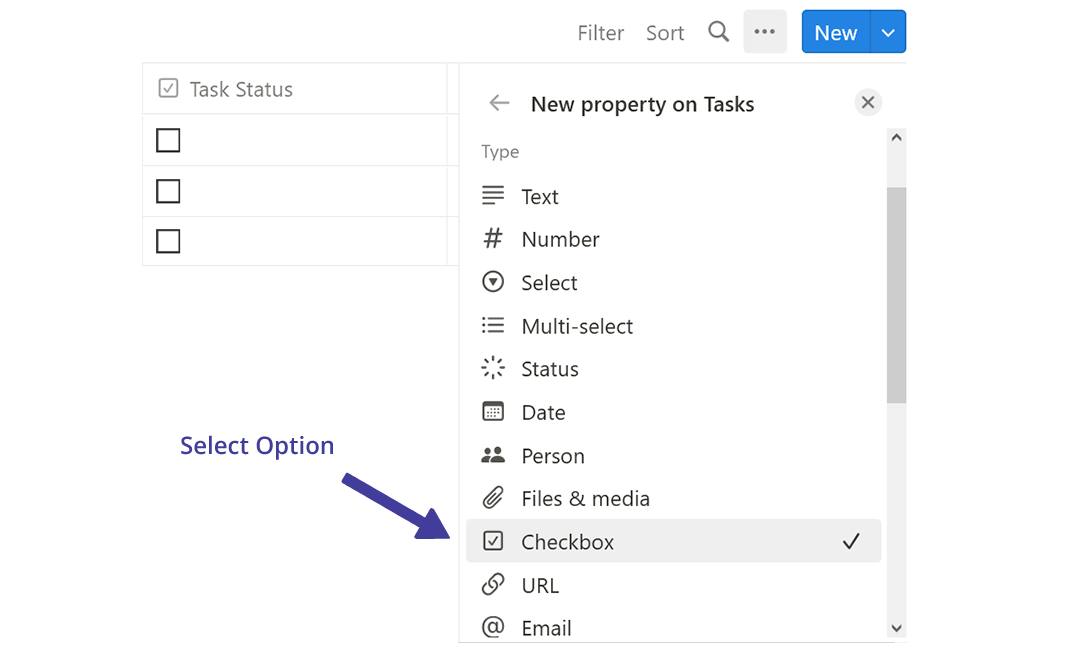
Now it’s time to select the checkbox option.
By default, the new column will be set to “Text.” To change this, look for the “Property Type” dropdown menu. Click on it and scroll down until you find the “Checkbox” option.
Select it, and voilà! Your Notion table now has a checkbox column for easy task tracking or any other purpose you might need.
Step 5: Check Results
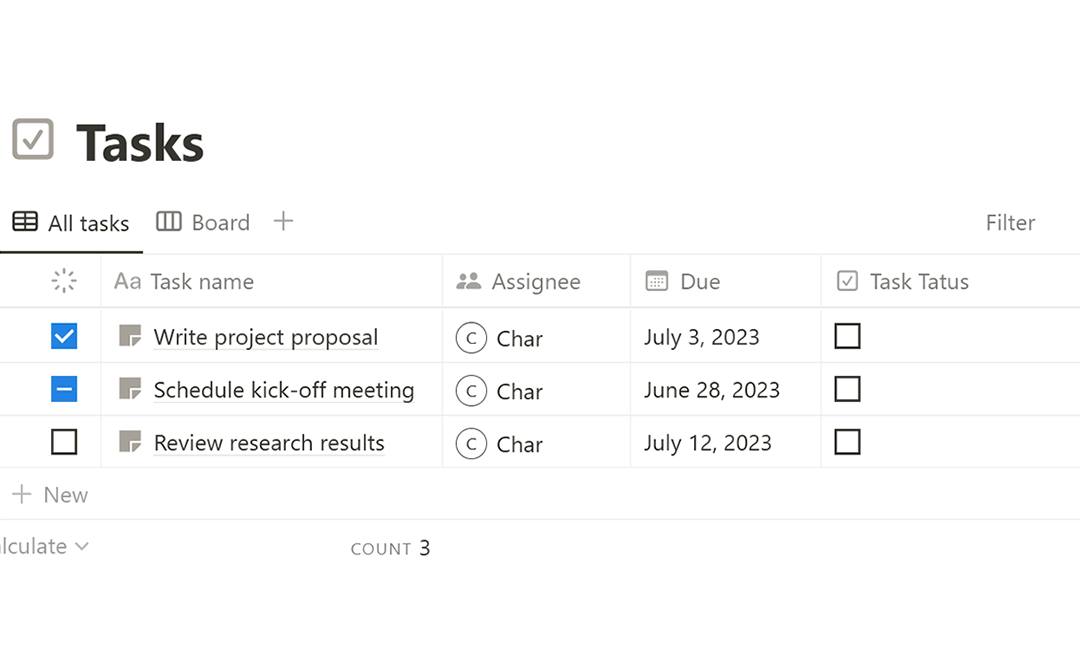
Finally, take a moment to review your Notion table with the newly added checkboxes. Ensure everything appears as intended and the checkboxes function correctly.
If something seems off, simply revisit the previous steps and make necessary adjustments.
Checkbox Tips & What To Avoid
Whether you’re exploring dynamic formulas or sharing your tables, checkboxes can be your trusty sidekicks. But remember, unchecked permissions and overuse can cause chaos.
In this section, I’ll share pro tips and what to avoid to make your Notion checkboxes work for you, not against you.
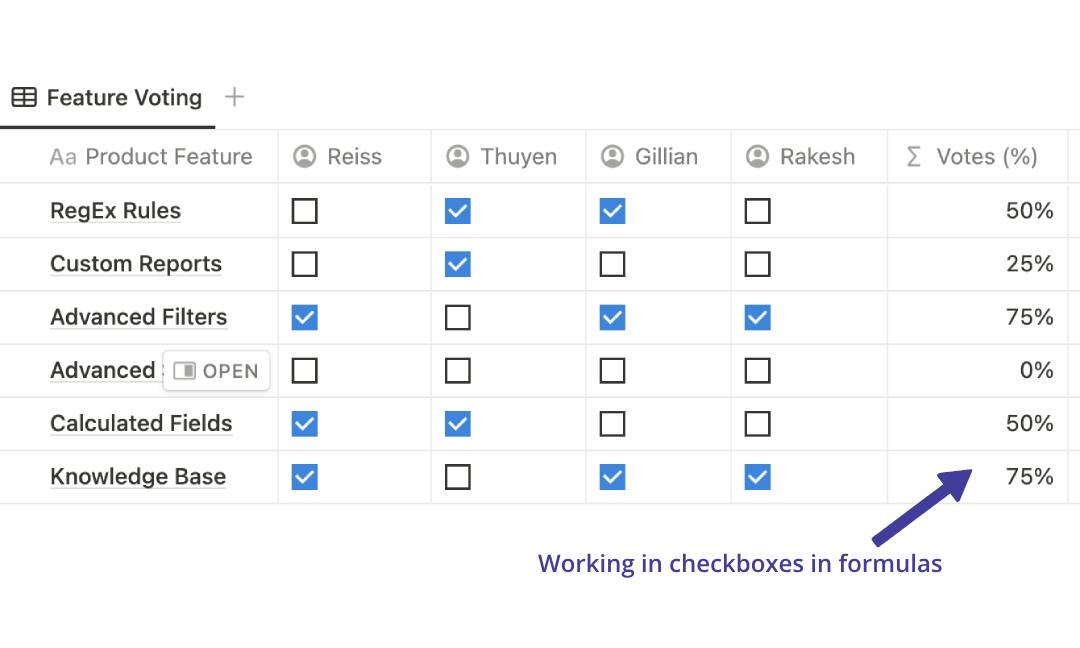
Use in Formulas
Want to take checkboxes to the next level? Use them in formulas.
Checkboxes hold boolean values (checked or not) and can be used in formulas to create cool things like progress bars, countdowns, and custom workflows. For example, you could create a formula that calculates the percentage of tasks completed based on the number of checked boxes.
Just remember, if a checkbox column is part of a filter or formula, don’t delete it!
Sorting & Filtering
Remember when I mentioned using checkboxes for sorting & filtering in Notion tables? This handy feature helps you quickly sift through which items are done and which are not.
To try it out, simply click on your checkbox column and hit ‘Filter’. Choose to show checked or unchecked items in the column.
Sharing Tables
Got a shared Notion table with checkboxes? Keep in mind, ANYONE can check or uncheck those boxes.
To avoid any mishaps, set the right permissions(1) and restrict editing. Don’t let your data get twisted by an unchecked permission – take a moment to review those settings.
Remember, not everyone needs full editing rights.
Overusing Checkboxes
While checkboxes in Notion can be handy, going overboard is a common pitfall. Excessive checkboxes create unnecessary clutter, making your table messy and hard to read.
And guess what? Sometimes, they’re not your best choice. If you need to represent more than two states, consider using select or multi-select property types instead.
Keep it simple and your Notion tables will be more organized and efficient.
HOW-TO: Add Notion Multiple Tables On One Page
Putting It All Together
How to add checkbox in Notion table you ask? Well, now you know!
It’s a simple yet transformative tool for managing tasks, filtering data, and enhancing collaboration.
Remember, checkboxes are more than a binary tool; they’re the secret ingredient to a well-organized and efficient Notion workspace. So, happy checking and here’s to a streamlined workflow!
Before writing an article, we carefully research each topic and only share information from reputable sources and trusted publications. Here is a list of the sources used in this article: