From top secret documents to full-on team collaborations, cracking the code on Notion sharing options can help your project take flight. It’s where you decide who gets a front-row seat and who stays behind the scenes.
With this ultimate cheat sheet, you’ll learn how to fine-tune your sharing settings so you can share your content with confidence.
What We Will Cover
Notion Sharing Options
Getting the hang of how Notion lets you share content can make a big difference. You want to make sure you’ve privacy when you want it, and teamwork when you need it.
Let’s begin with understanding the different sharing options. Once we’ve got that down, we’ll move on to setting everything up just the way you need it.
Private Pages
When you create a new page in Notion, it’s for your eyes only. It’s private, meaning no one can see it until you’re ready to share it.
And when you do, remember that sharing your private page isn’t just about one page — any sub-pages that you’ve organized under it will be visible to others as well.
Private pages are your spot to think, create, and plan, keeping everything under wraps with the confidence that your private work won’t go public until you’re entirely ready for that step.
Teamspaces
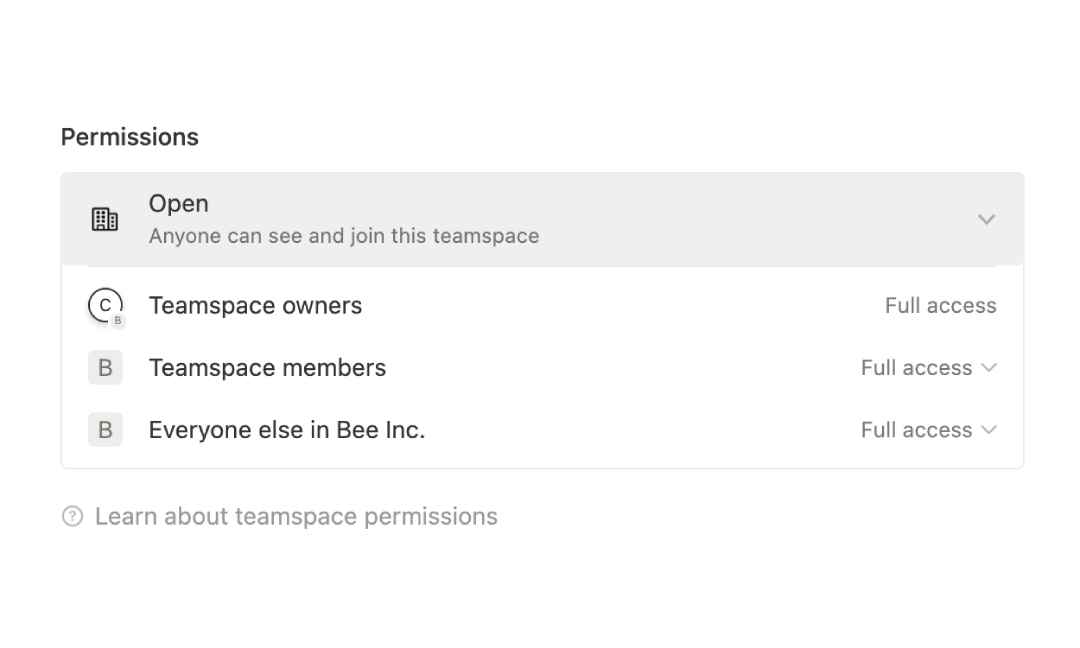
Teamspaces in Notion are your collective workspace where you and your team jump in and collaborate.
Setting one up is straightforward: you just name it and invite your team. What each teammate can do depends on the roles you hand out.
Just a heads up: if you have guests in your workspace, they have access to your teamspace too. If you’re on a higher plan, you have more control over who gets to see what.
Workspace
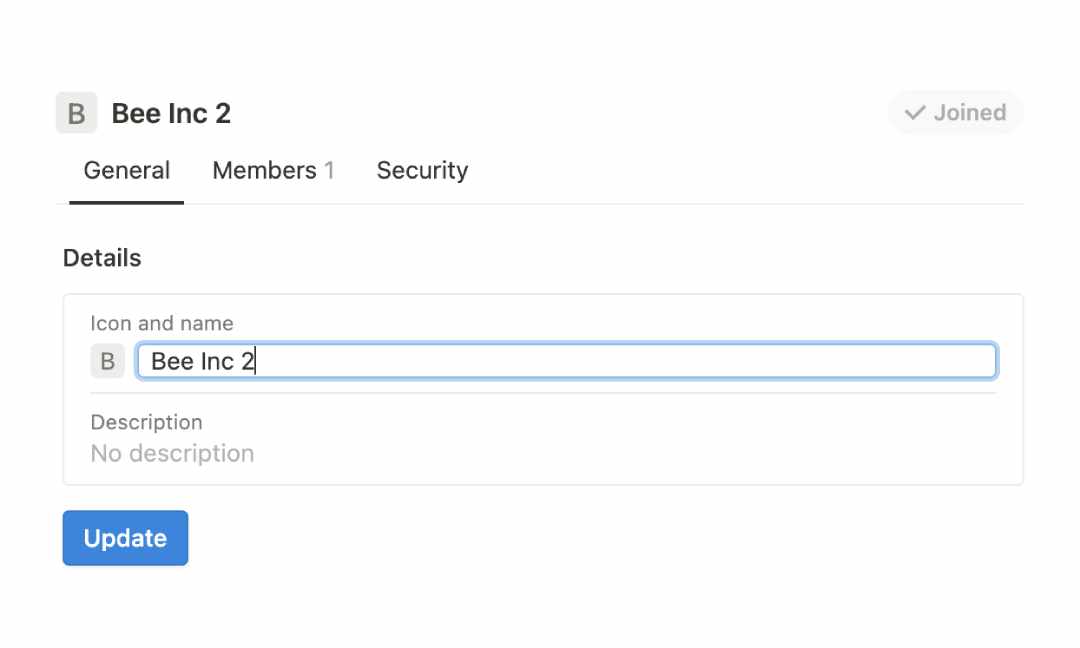
Consider your workspace in Notion as the central hub for all your work. It’s where all your pages and projects live, and it’s the spot for team collaboration.
It’s private from the start, so there’s no rush to share anything.
Unlike teamspaces that are for group work, the workspace includes everything — your private pages and teamspaces. It gives you the freedom to manage how you work, whether that’s keeping things to yourself or collaborating.
YOU MAY LIKE: How To Duplicate Your Notion Workspace Like A Pro
How To Share Notion Pages
When it comes to sharing in Notion, you’ve got a tonne of options!
You can keep things tight-knit with specific individuals, groups or go as wide as making a page public. I’ll guide you through the sharing process of each, so you can collaborate effortlessly or broadcast your pages far and wide.
Share With Individuals
Want to share your Notion pages with just the right individual? It’s super easy. Whether it’s your weekend plans or a big project, you can decide who gets a look and who doesn’t.
Follow my simple steps, and you’ll be sharing your pages safely and smartly in no time.
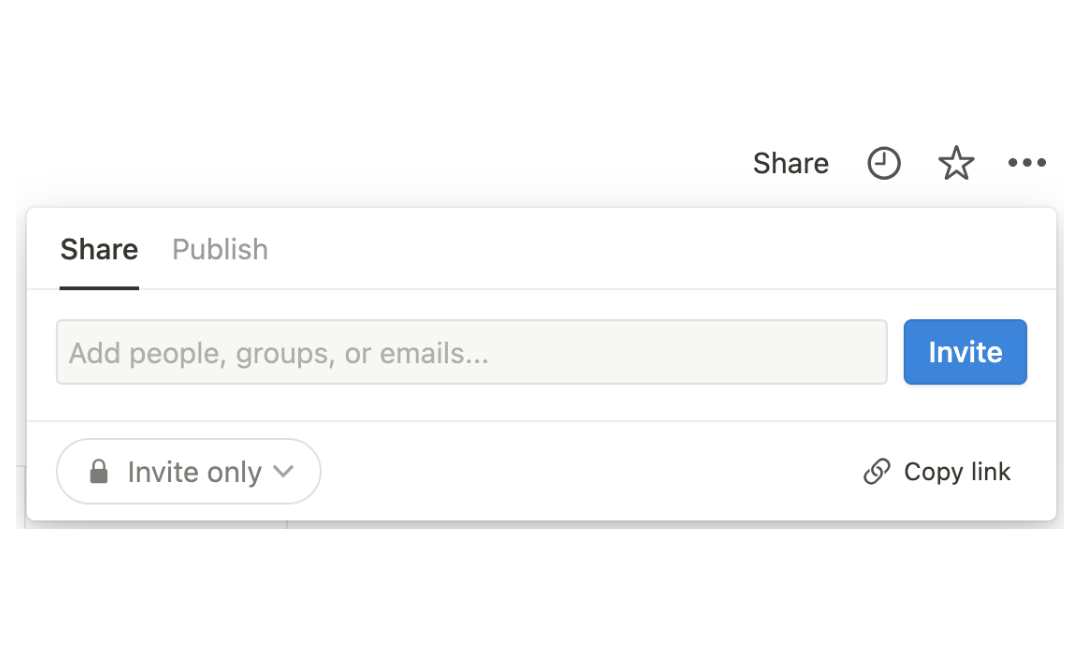
Step 1: Hit the Share Button
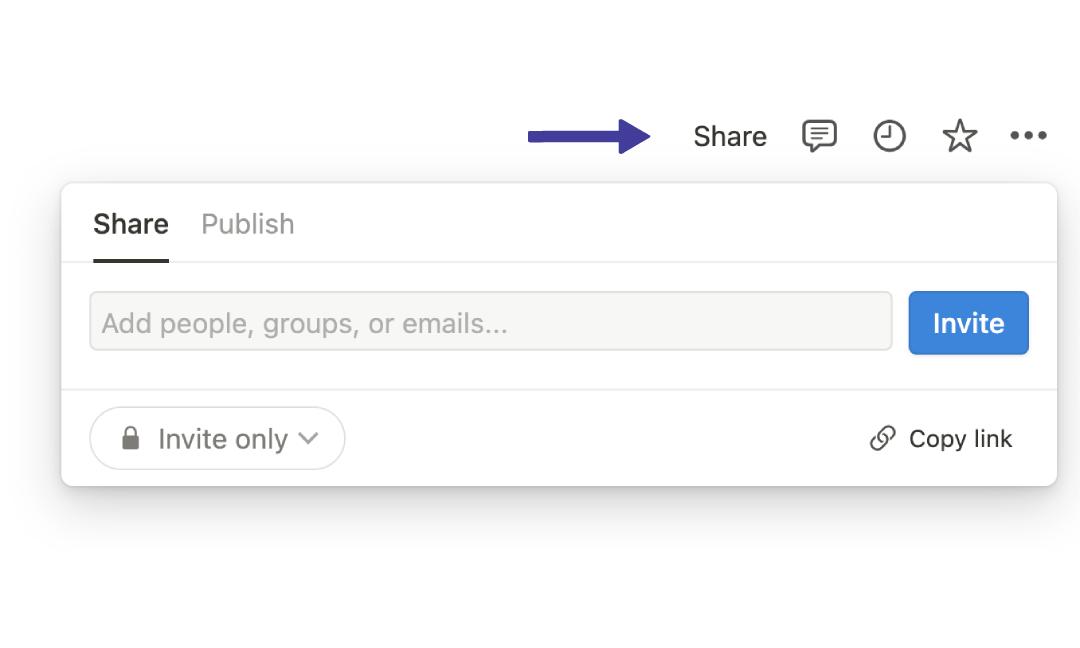
Go to the top right of the private page you want to share and click ‘Share’. This button is your first step to bringing others into your page or workspace
It’s the same deal on your phone, too—just tap the arrow icon for the same options.
Step 2: Invite Collaborators
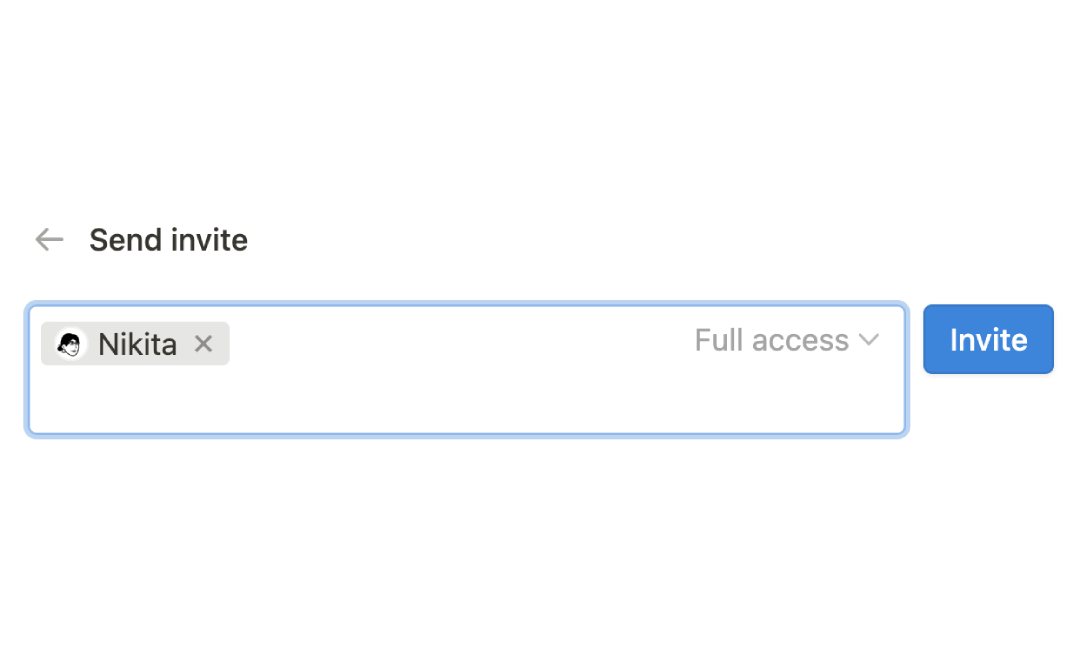
In the sharing menu, type the email addresses of your collaborators.
As you invite people, Notion makes it easy by categorizing them under ‘In page’ or ‘Not in page’, helping you track who’s been given access.
Step 3: Set Permissions
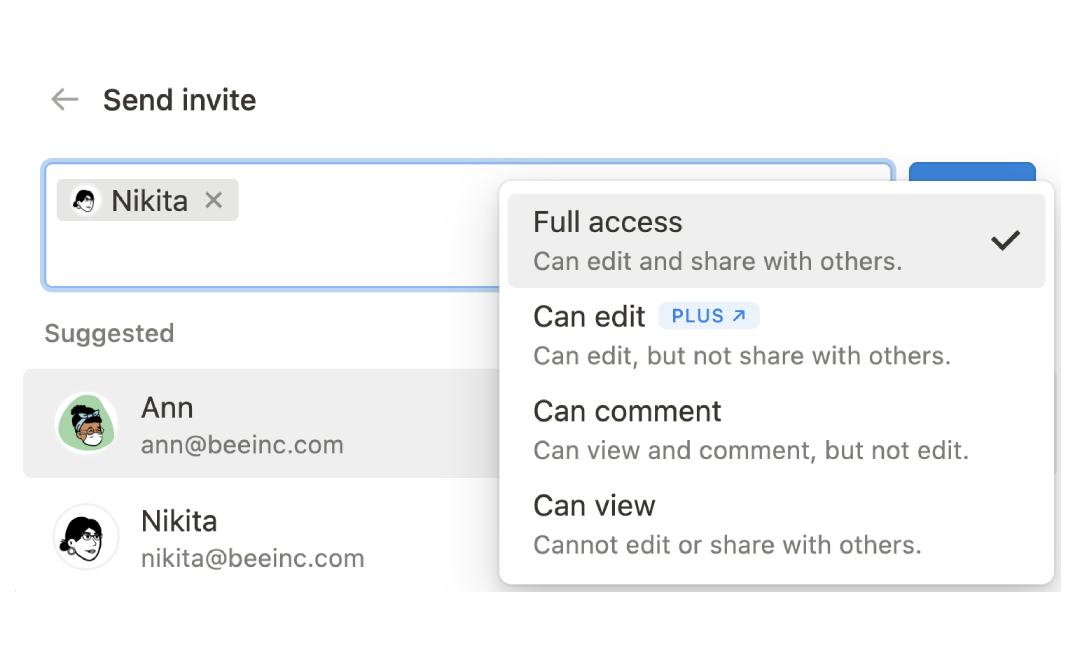
Before sending out your invites, you can decide what your guests can do with your page. Can they edit, comment, or just view?
Click on the dropdown next to their name and set their permission here.
Step 4: Invite Away!
All set?
Hit that ‘Invite’ button. Your chosen collaborator will get a ping, and just like that, they’re ready to jump right in.
Share With Your Team
Working with your team in Notion should feel like you’re all in the same room, even if you’re miles apart.
Here’s a breakdown of how to share your work with the whole squad, making sure everyone’s in sync and up to speed.
Step 1: Click The Share Button
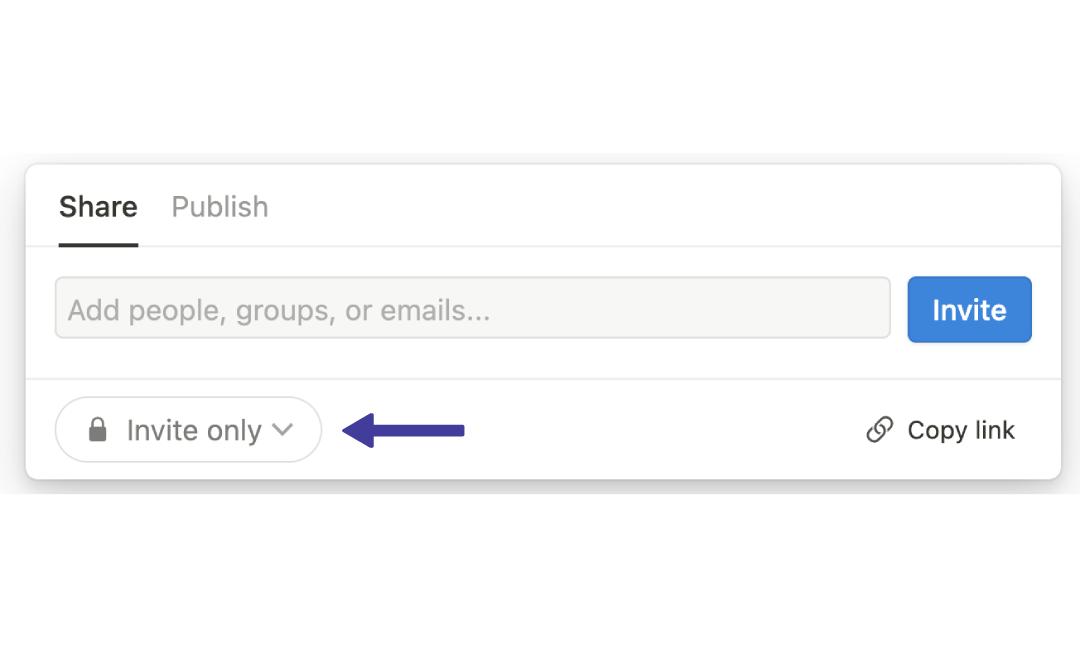
It’s just like sharing with individuals. On the page you’re looking to share, click the share button.
This time, you’ll be focusing on the ‘Invite Only’ dropdown menu that appears, which lets you step beyond individual sharing.
Step 2: Share With Workspace
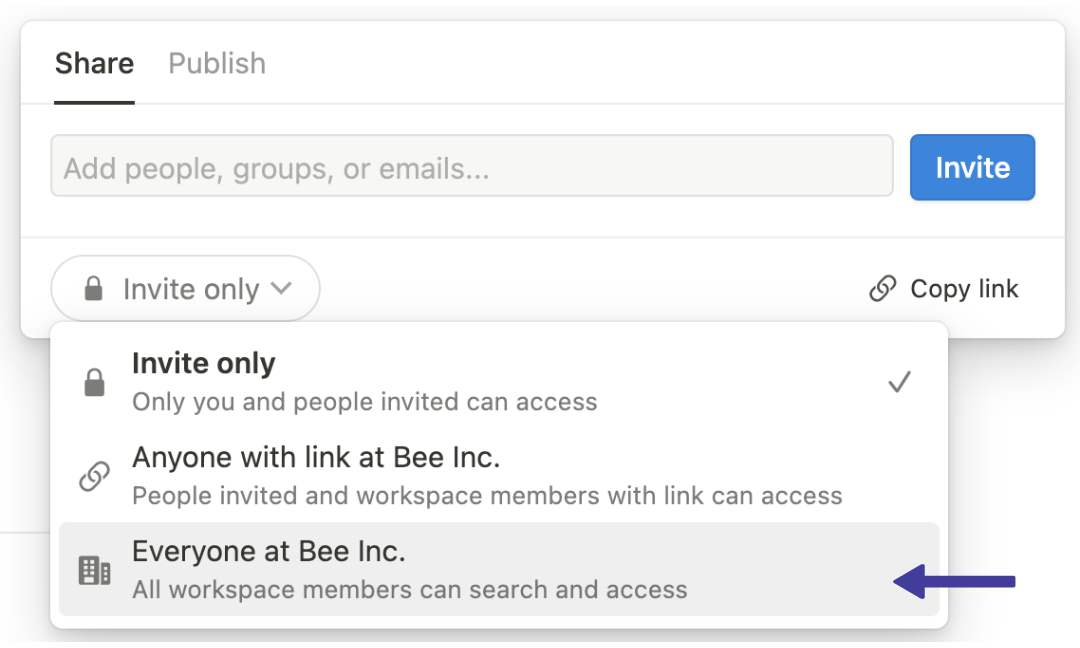
In that dropdown, you’ll find the option to share with ‘everyone in your workspace’.
Select this to open up the page to all your teammates, clients, or anyone else you’re collaborating within your workspace.
Step 3: Set Permissions
After choosing to share with your workspace, you can set permissions. Decide what collaborators can do: can they edit or only view?
Then, send out your invites and get the team rolling.
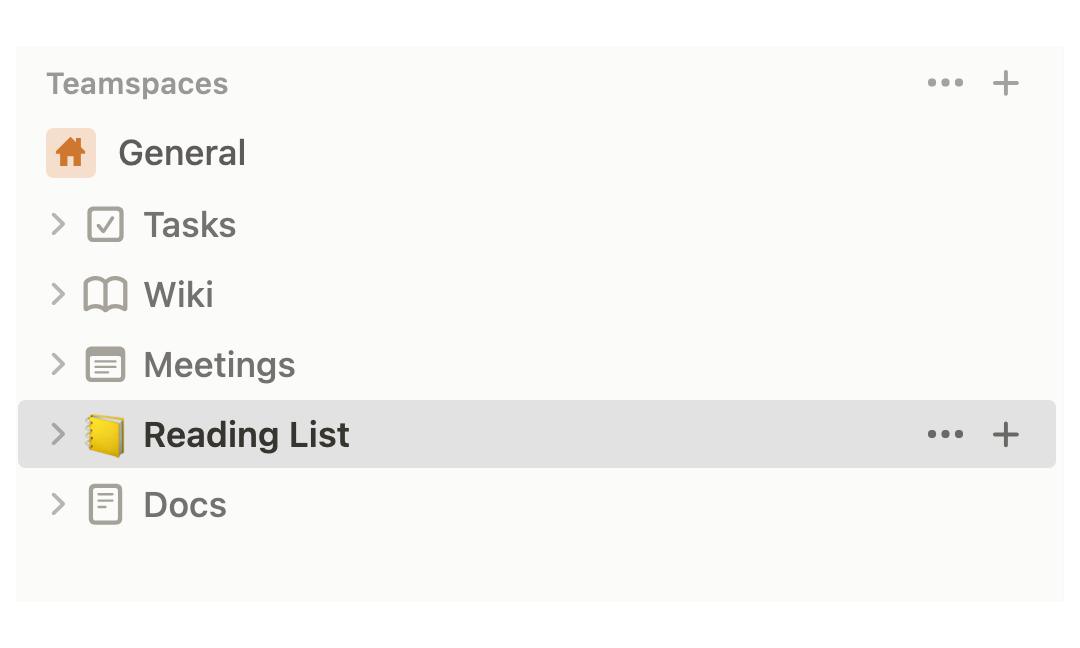
Alternate Step: Share With Teamspace
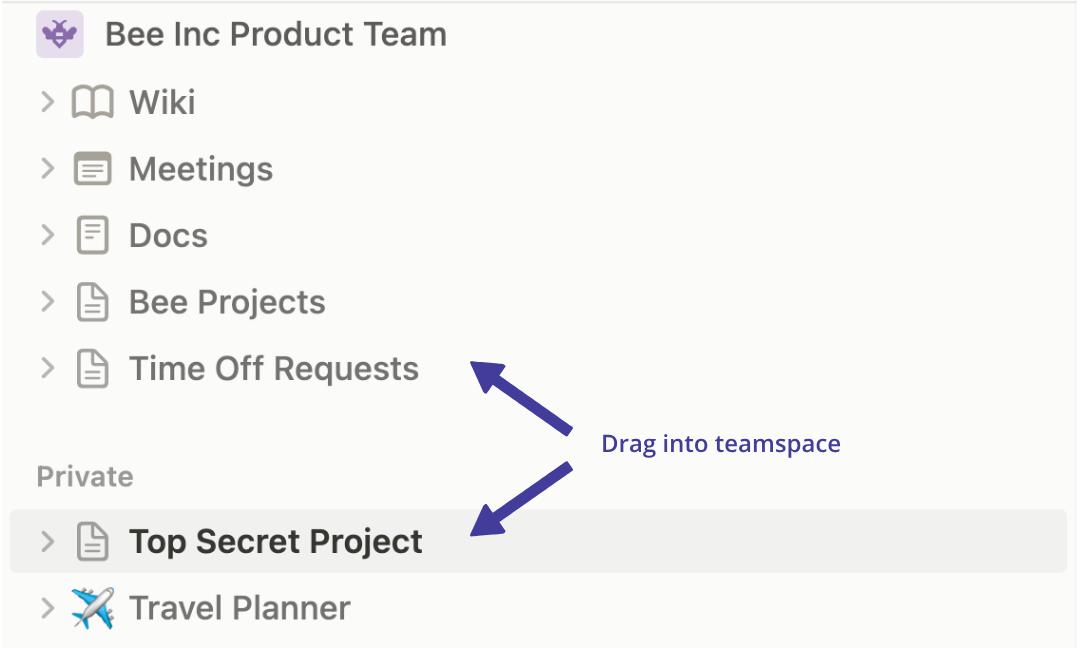
Sometimes you might want to narrow it down to a specific teamspace within your larger workspace. That’s simple too.
Just drag your page over to a teamspace listed in your sidebar, and it will become accessible to all members of that teamspace, simplifying collaboration with a specific group .
Share Publicly
Notion’s ‘Publish to Web’ feature is your go-to when you’re ready to take your page public.
It’s just a handful of easy steps – and yes, I’m here to guide you through the process, making sure your page is accessible to anyone, anywhere, all with a single click.
Step 1: Pick Your Page
Find your way to the Notion page you’d like to share and just like the other options, click the “Share” button.
Now hover over to the second tab, called ‘Publish’, next to the ‘Share’ tab.
Step 2: Publish To Web
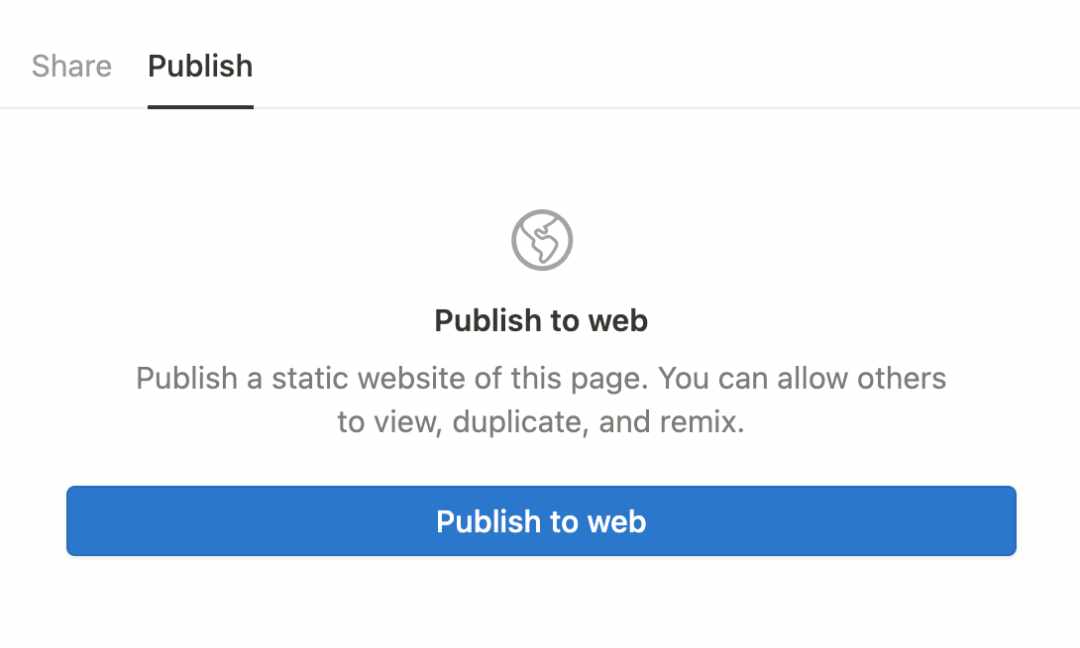
This should load up the ‘Publish to Web’ option. This is the option you’ll want if your goal is to make the page publicly accessible.
Click on the button. This converts your private page into a public resource that anyone with the link can access.
Step 3: Grab The Link
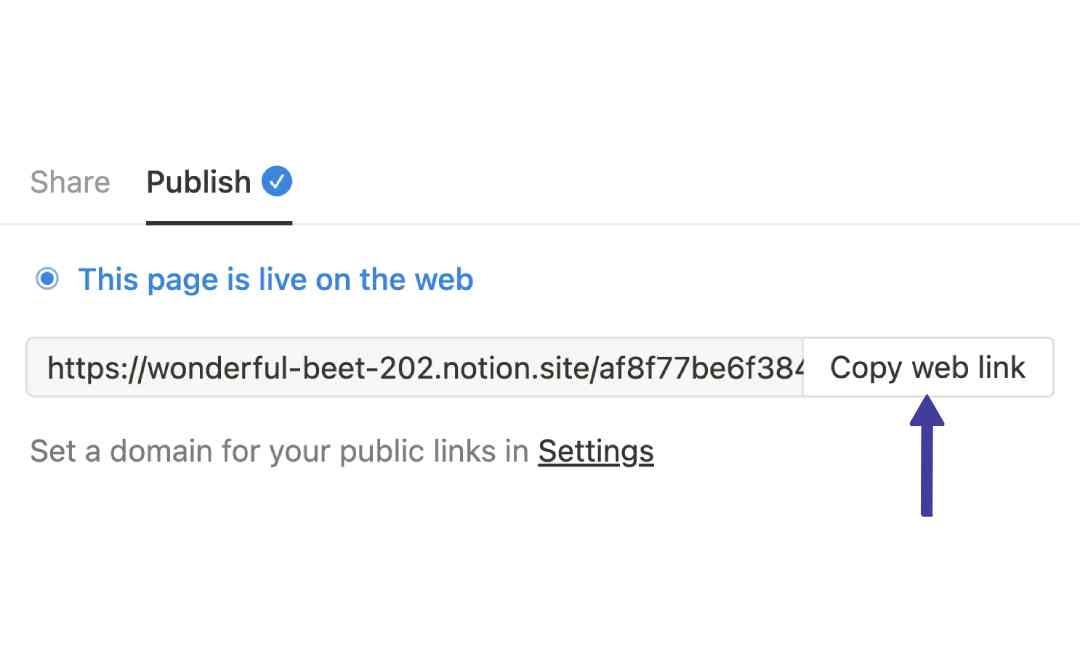
After enabling the page for public view, Notion will create a unique URL for you.
This URL is the golden ticket for your audience to access the page, no login fuss needed.
Step 4: Share Your Content
Lastly, take that URL and pass it along however you see fit. Post it, email it, tweet it – it’s your call.
This way, your content is out there for anyone to see, and you’ve just expanded your reach with a few clicks.
Setting Sharing Permissions in Notion
You’re a now a ‘master of Notion sharing options’. You’ve shared your page, and now it’s all about who gets to do what.
You can give full editing power to the ones in charge, or just let individuals make changes without messing with who else can see the page.
Let’s walk through the options, from ‘Full Access’ to ‘View Only,’ to find the perfect fit for your team and content.
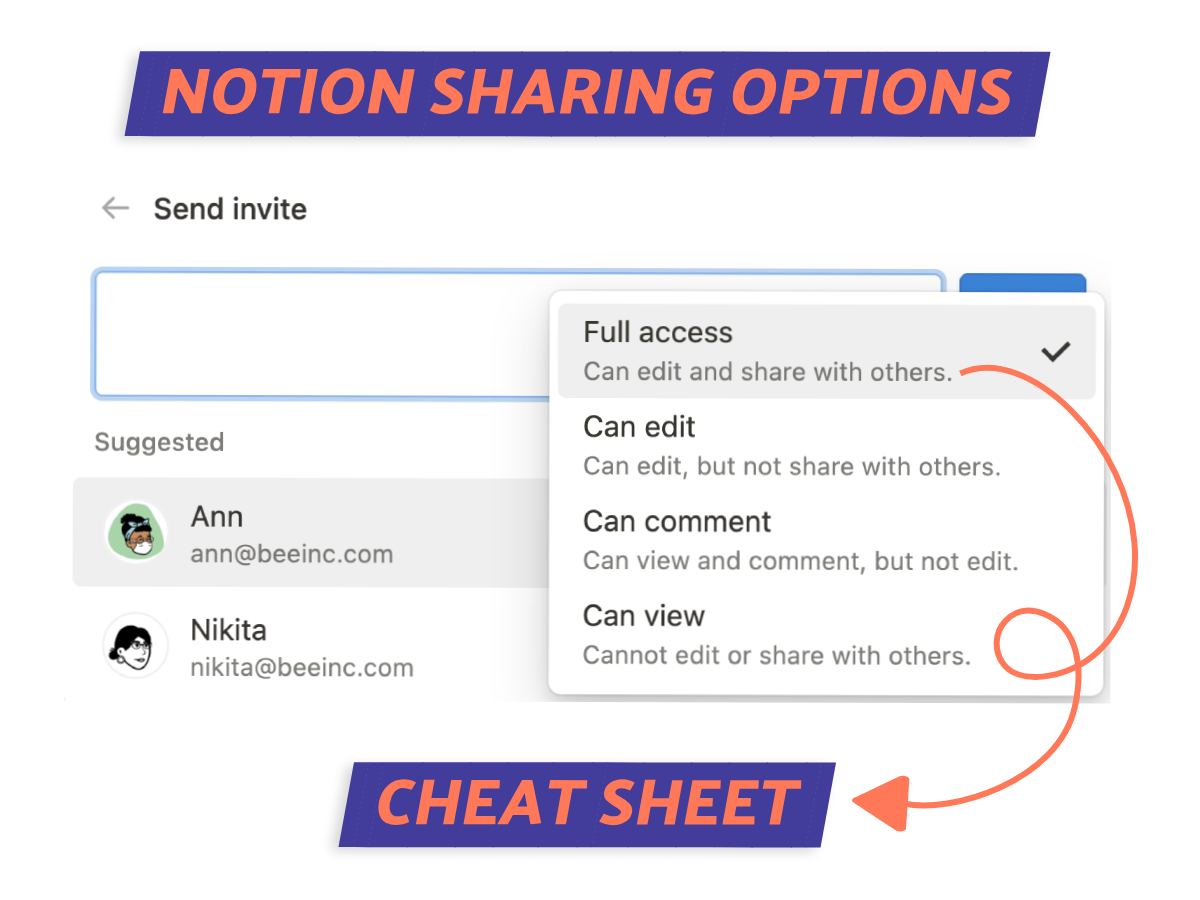
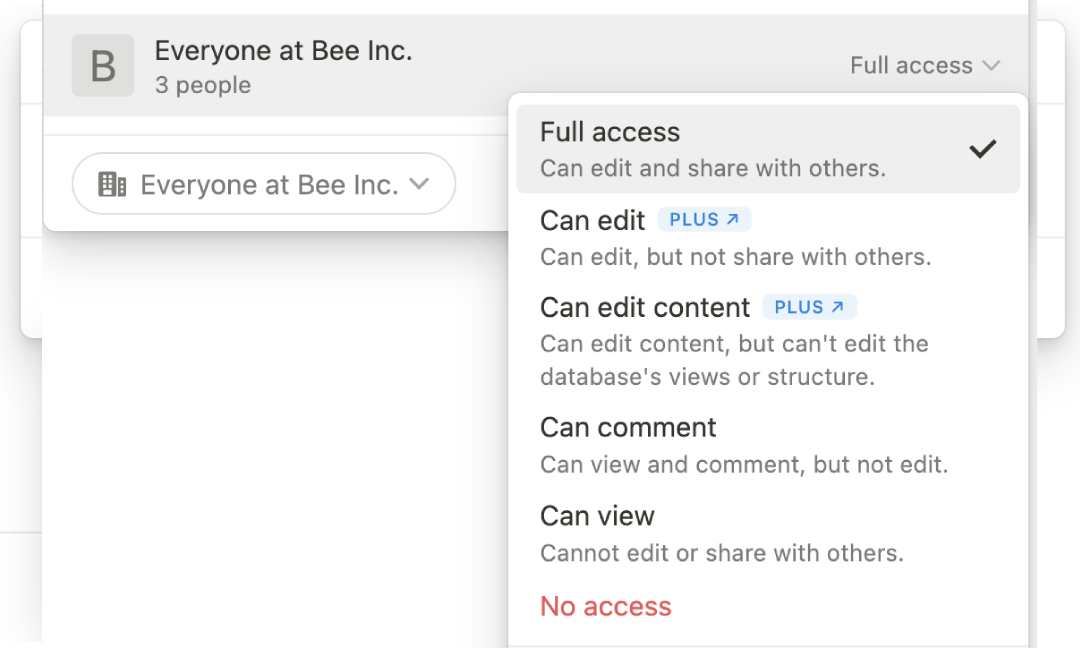
1. Full Access
With ‘Full Access,’ you’re handing over the keys to the kingdom. Users can edit, comment, and even extend sharing invitations to others.
This level of access is ideal for collaborators who are deeply involved in the project like team leads or project managers who need to have control over the document’s lifecycle.
2. Editing
The Editing permission is a notch down from Full Access. It gives team members access to the content and make their mark without the ability to alter sharing settings.
It’s great for contributors who are hands-on with the material but don’t need to control access levels.
FYI, the ‘Can Edit’ permission is exclusive to those on the Plus plan(1) and above.
3. Commenting
Then there’s ‘Can Comment’. With ‘Can Comment’ access, individuals can provide feedback on a page without making actual changes to the content itself.
Have clients or guests? This option is ideal for scenarios where input is required from external parties who are reviewing the material.
4. View Only
Finally, ‘View Only’ is self-explanatory. It’s for when you want to share information broadly without any risk of alterations.
Choose this when you’ve got that final version of a company memo or a knowledge base ready for prime time.
And if you’re opting to ‘Publish To Web,’ I’d suggest sticking to ‘View Only’ to keep things nice and secure.
Wrapping It Up
Now, you’re ready to roll! With a clear understanding of Notion’s sharing options, you’ve got the control to keep things private or get the whole team involved.
Go ahead, set those permissions with confidence, and watch as your workspace transforms into a hub of productivity and privacy, exactly as you need it to be.
Before writing an article, we carefully research each topic and only share information from reputable sources and trusted publications. Here is a list of the sources used in this article:
- Notion: https://www.notion.so/pricing