Want to protect your brilliant ideas or favorite internet finds with Notion private pages? Well, your Notion workspace is about to get a whole lot more secure.
In this guide, I’ll personally take you through the ins and outs of creating and managing these private pages. We’re about to embark on an exciting 3-minute lesson on mastering Notion’s privacy settings. Let’s go!
What We Will Cover
What Are Notion Private Pages?
Someone mentioned to me that Notion private pages are like ‘super-secret diary entries we used to hide from our siblings’. I chuckled hard.
These pages are accessed only by the user who created them, meaning they’re not shared with others. It’s your private corner of Notion. If you’re like most users, most of your pages should stay private.
Unless you decide to make it public or share it, no one else can sneak a peek at your thoughts or ideas.
Are Notion Pages Really Private?
No straight answers here. It truly depends on a couple of factors.
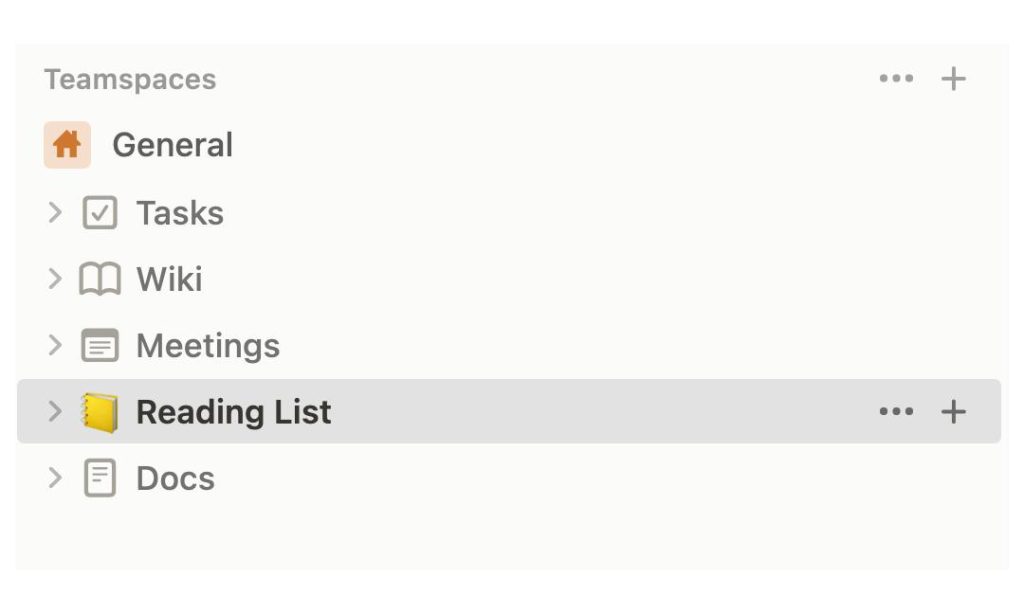
If you create a page in a Teamspace, it’s accessible to everyone in the group. But if it’s not part of a Teamspace and not shared publicly, it stays private.
I’ve found it super important to always double-check my settings, just to be sure. Make sure you know where your page lives and the sharing settings to keep things private or public.
How To Make A Page Private On Notion – 2 Options
Want to keep your pages super private? There are 2 simple ways to make Notion private pages.
I’ll touch on both methods below and provide easy step-by-step instructions. How-tos coming right up!
Option 1: Move The Page
The first way to make a Notion page private is to simply move it! Yes, it’s that easy.
I’ll run you through how in 3 simple steps below. Don’t let unwanted eyes access your data.
1. Select Page
First up, pick the Notion page you want to make private.
Give it a good look, because once it’s private, everyone else will lose access! You don’t want any “oops” moments, right? Once you confirm you have the right page, move on to the next easy step.
2. Drag Page
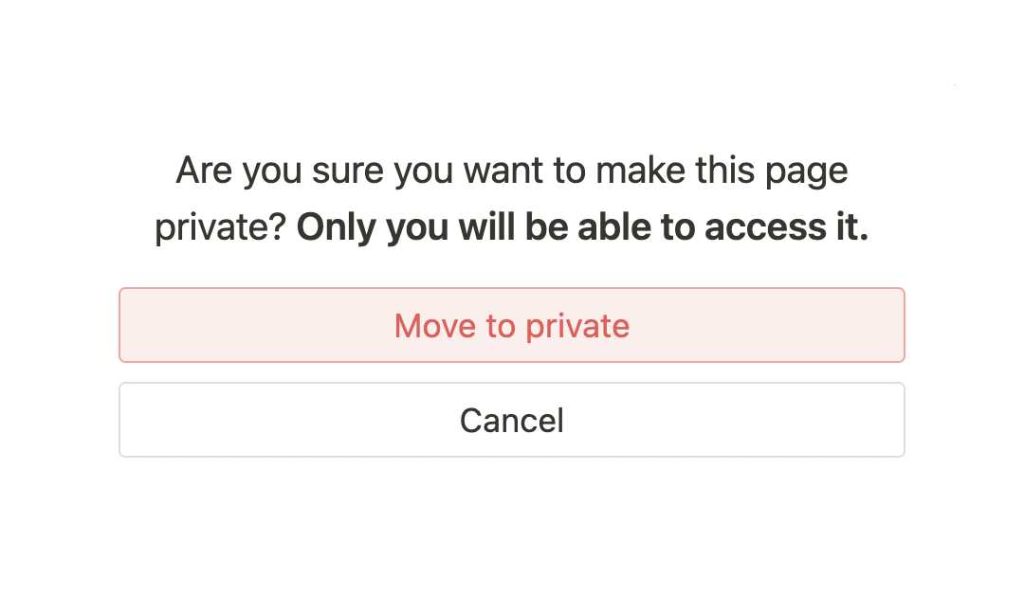
Now, let’s drag that page into the private section!
To do so, simply click and hold your page, then drag it right under the “Private” section. As you do this, you’ll notice a message popping up below. Don’t forget to click “Move To Private” to seal the deal.
Your page is secure in its new private corner.
3. Unpublish
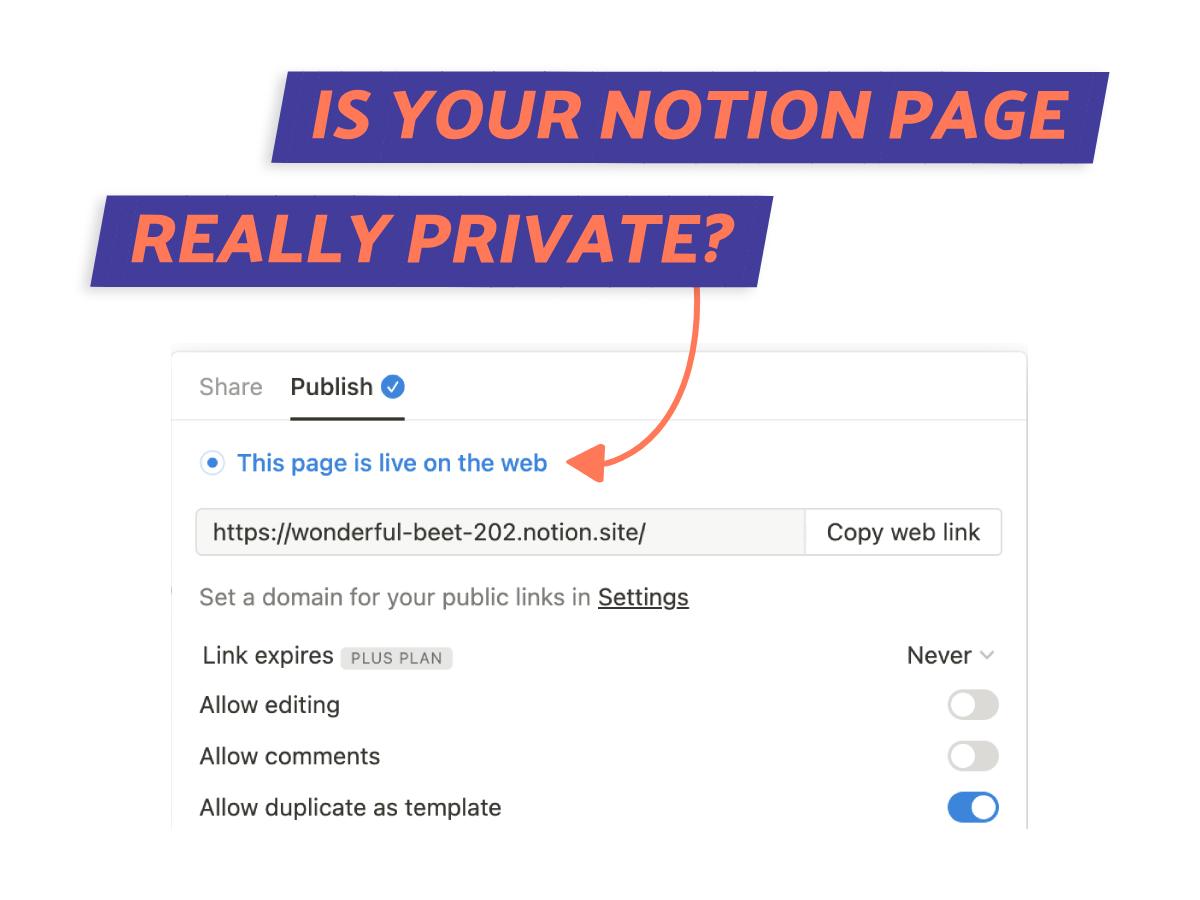
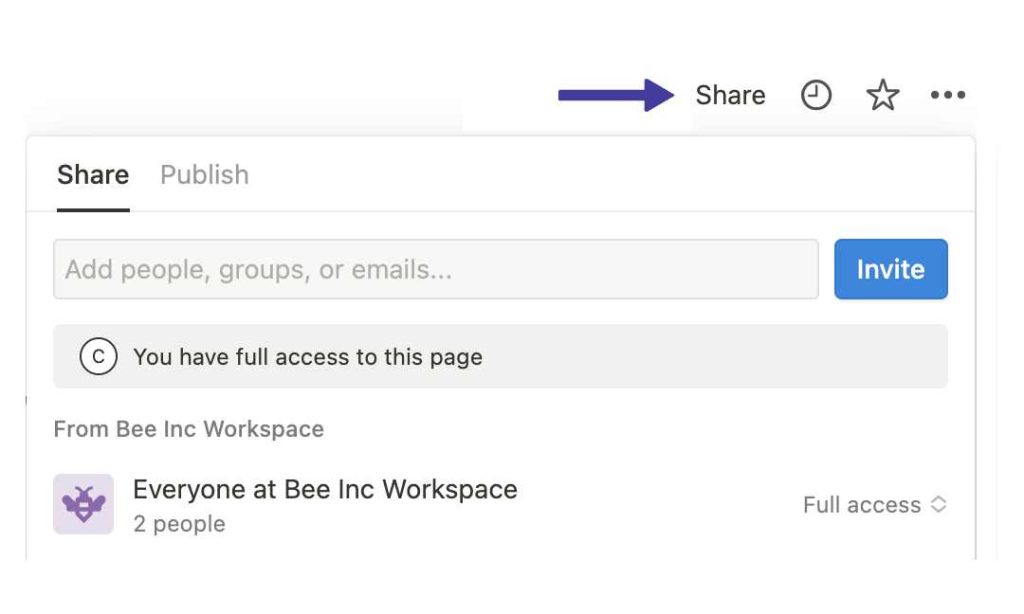
Finally, let’s make sure that page isn’t shared with anyone or published to the web.
Click on ‘Share’ located at the top right corner. Ensure that you are the only one with full access.
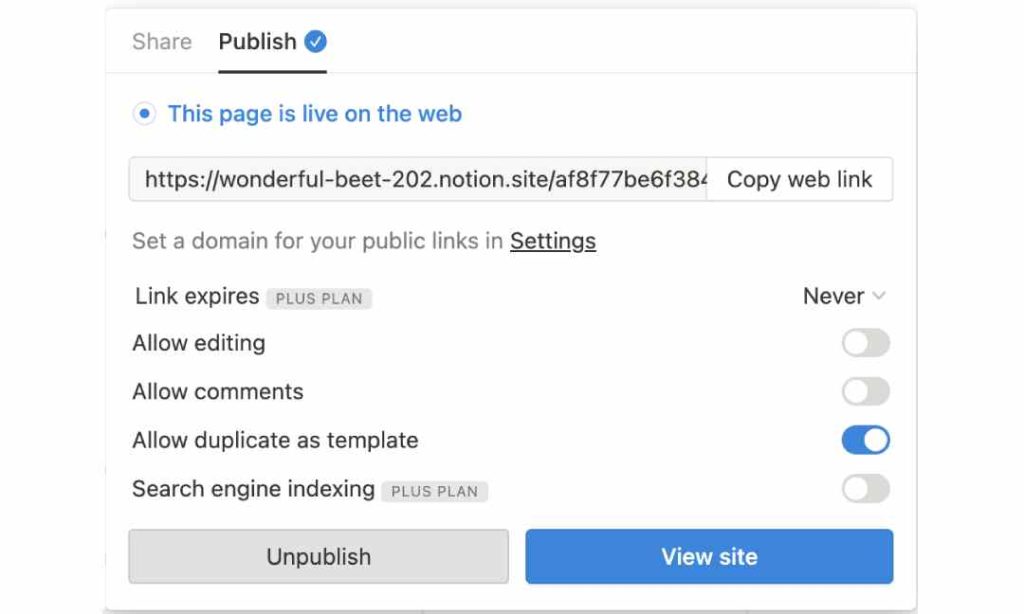
Next, let’s make sure the page is not published. Click on the ‘Publish’ tab (next to ‘Share’) and if it doesn’t say ‘This page is live on the web’ you’re good! If it does, mossy on to the ‘Unpublish’ button.
And there you have it – your Notion page is for sure for your eyes only.
Option 2: Change Permissions
Next, I’ll show you how to make a page private in Notion by changing page permissions.
It’s a bit more complex than the earlier method but gives you the flexibility to customize access levels. Learn how to remove access completely, ensuring your important content stays restricted to selected individuals. (1)
1. Click On Share
Much like before, the first step is to locate the page you want to keep private.
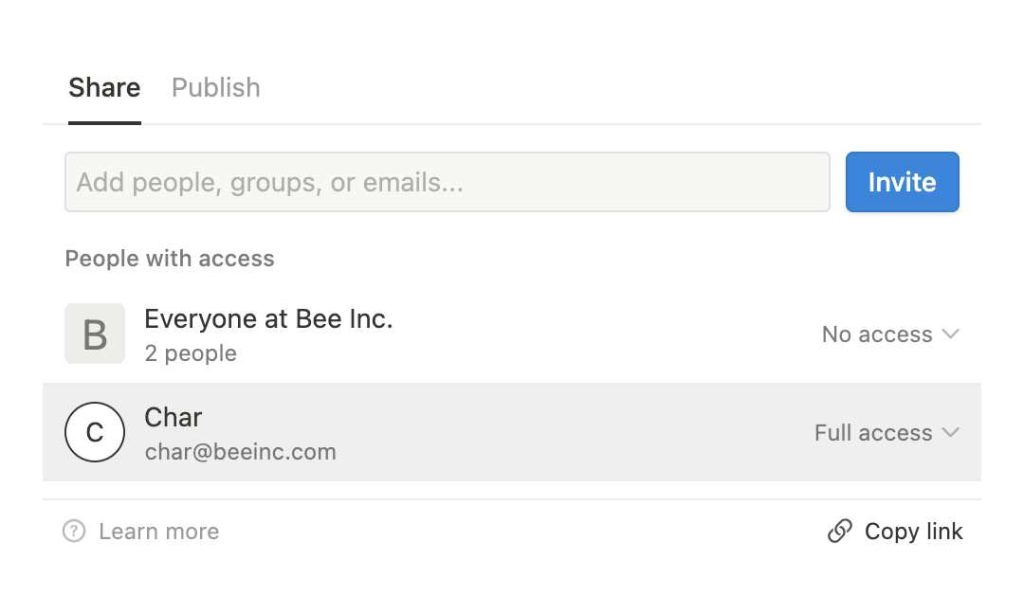
Now, spot that ‘Share’ button in the top right corner? Click it and a bunch of permissioning settings will show up.
2. Choose Who To Remove
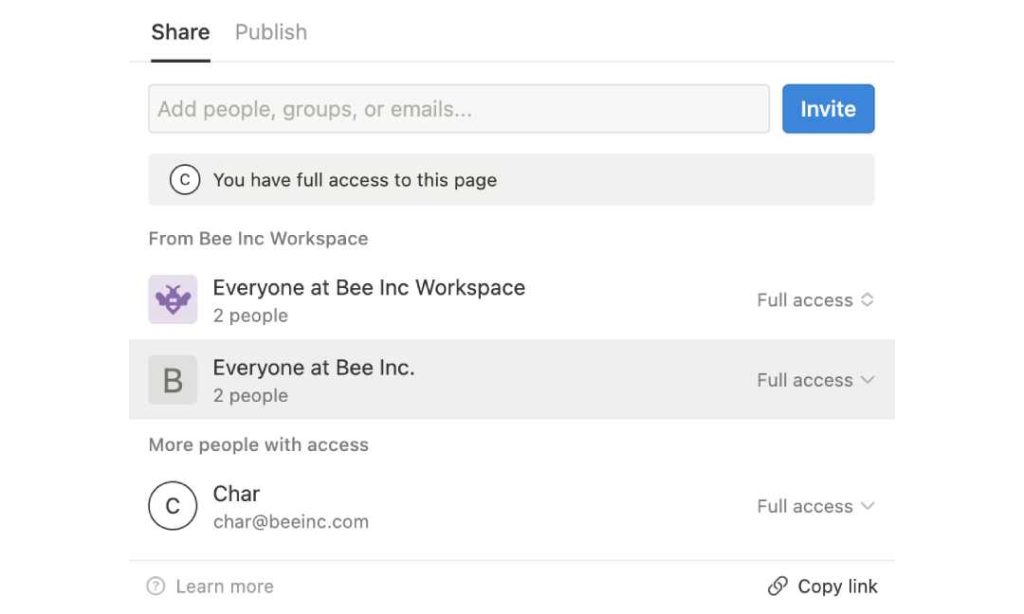
You get to decide who stays and who goes! That’s right, you have the power to choose which users to remove, or even restrict access completely.
Want to boot everyone out? Just click on the Full access dropdown, and you’re in control.
3. Remove Access

In step 3, you have the option to decide what permissions – like “read-only” or “edit” – you want to give out.
To keep the page totally private, go for ‘No Access’. Do the same for other folks or groups you’ve shared with. It’s like setting personal boundaries, but for your Notion pages :).
4. Unshare
Alright, time for the last step. Just like the last method, click ‘Share’ at the top right corner.
Do a once over and make sure it’s not ‘published to web’. Phew, that was close! Now you can enjoy your creation without the whole world peeking in.
YOU MAY LIKE: Why You’d Want To Consider Loggging Out Of Notion
What We’ve Learned/ Summary
There we have it. Keeping your Notion pages super-secret doesn’t have to be as tricky as a stealth mission.
Whether you’re shielding your personal portfolio or safeguarding those nuclear codes, it all comes down to page location and settings. And you can do this easily just by leveraging Notion private pages for your needs.
FAQs
Are my Notion pages private?
I touched upon this earlier, so scroll to the top for full details.
In general, your Notion pages are private if they’re not part of a Teamspace and not shared publicly.
But, you know, it’s always a good idea to double-check your settings if you’re unsure. Keep an eye on those settings and make sure “Share To Web” is disabled.
How do I know if my Notion page is private?
Curious if your Notion page is completely private? Just click on the Share settings to see who it’s shared with.
Check that it’s not shared with team members or other individuals.
Finally, double-check it’s not shared publicly. Voilà! Privacy maintained, now enjoy creating in peace.
Before writing an article, we carefully research each topic and only share information from reputable sources and trusted publications. Here is a list of the sources used in this article: