Today, I want to talk about how you can share Notion page without login details. Yeah, you heard right. It’s actually quite straightforward.
But don’t worry, we won’t stop at just that. I’ll walk you through different methods and even some security pointers. So, if you’re up for it, let’s jump right in.
What We Will Cover
Can You Share a Notion Page to Those Without Login Details?
Absolutely, you can share a Notion page with users who don’t have an account. It’s as simple as adjusting a few sharing settings.
But here’s the cool part that most people don’t talk about. There’s more than one way to do this!
You can also control what they can do on the page. Can they edit or just view it? You’re in the driver’s seat, setting the rules.
How to Share Notion Page Without Login Details
In the next section, we’ll uncover 3 ways to share a Notion page without a login.
I’ll kick off with the popular ‘Publish to Web’ method, discussing its strengths and weaknesses before jumping into the steps.
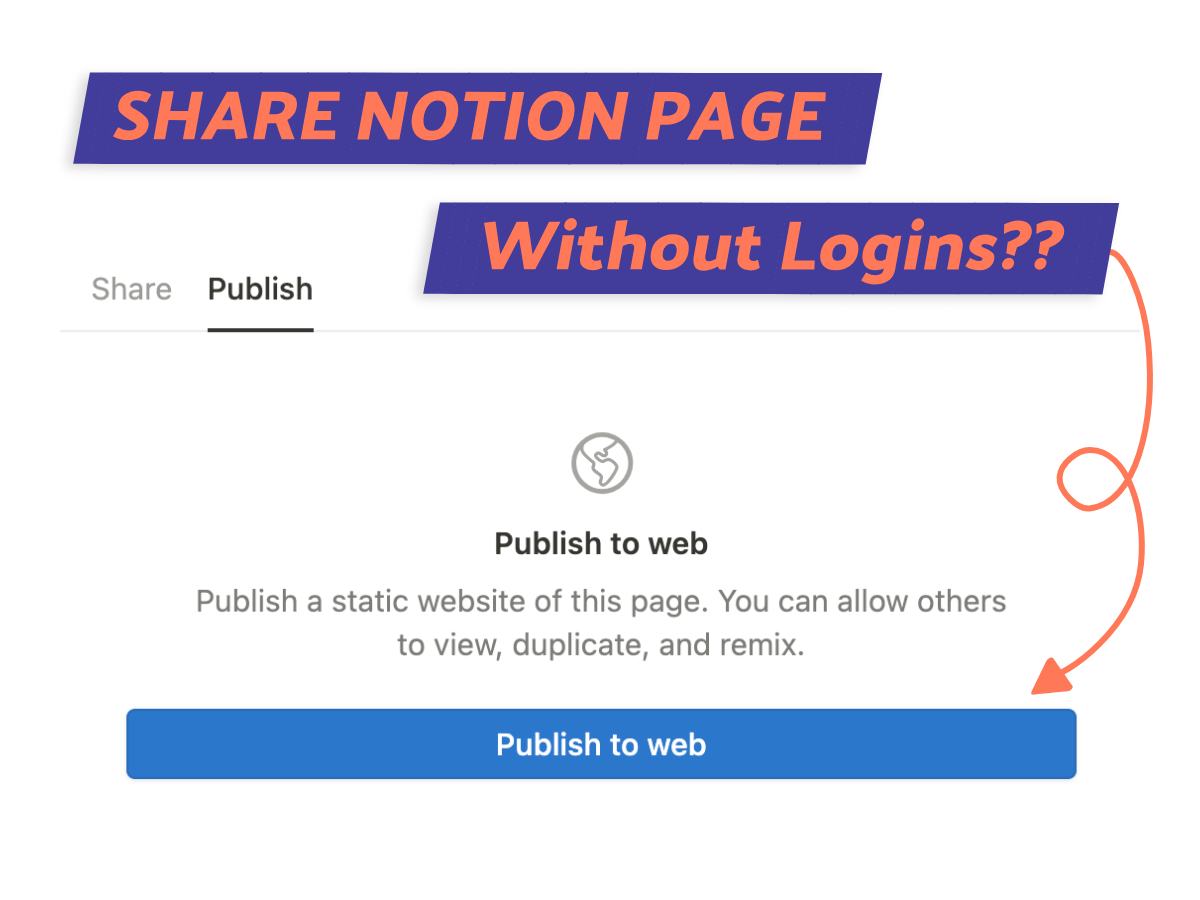
1. ‘Publish to Web’ Method
The ‘Publish to Web’ method is hands down the easiest way to share a Notion page. Anyone can use the link; no login is needed.
Just click on the ‘Publish to Web’ option, and you’ll have a unique URL ready to go. But don’t just take it at face value, below I’ll hash out the pros and cons.
Cons:
- Privacy Risk: With the ‘Publish to Web’ method, anyone with the URL can access your Notion page. You cannot control who comes across your sensitive data.
- Tracking: You cannot trace who has viewed or edited your content.
- Personalization: You cannot customize the user experience. Everyone gets the same view.
Sharing a Notion Page Using the ‘Publish To Web’ Method
Step 1: Access Share Settings
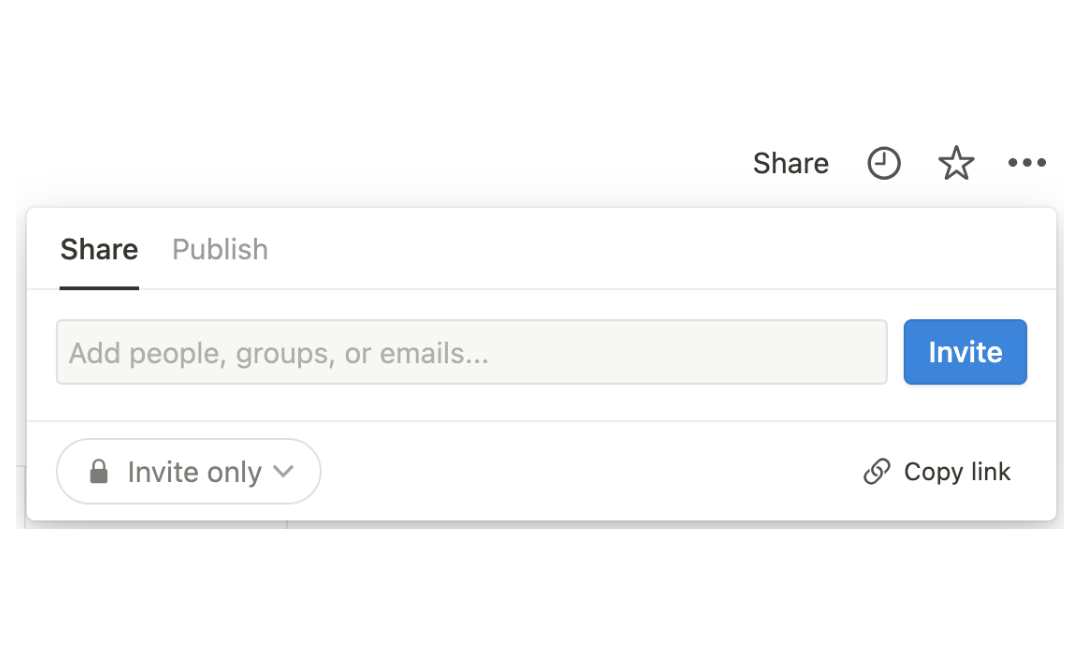
To kick off the ‘Publish to Web’ process on Notion, head to the sharing settings of the page you want to share.
You can find this by looking for the ‘Share’ button conveniently located at the top right of your page. Click it, and just like that, you’re presented with various options for sharing your page.
Step 2: Turn On ‘Publish to Web’
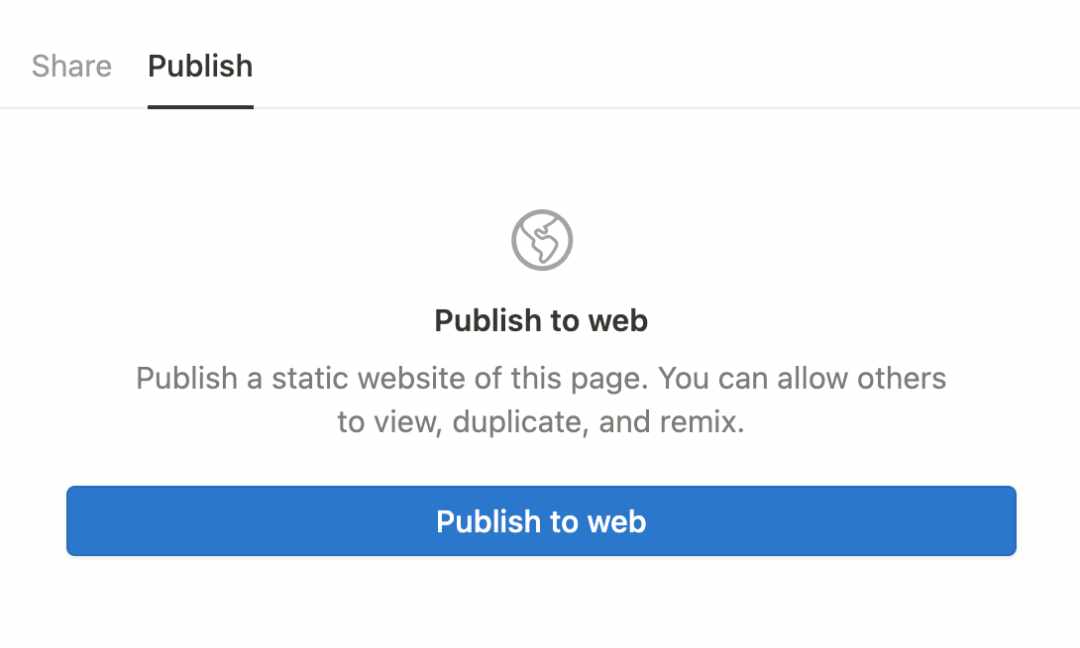
Once you’re in the sharing settings, you’ll see a ‘Publish’ tab. Go ahead and switch to it.
Now, the blue ‘Publish to Web’ button should show up. Click it and you’ve turned on public access for your Notion page. Yes, that means anyone who has the link can view it.
Step 3: Change Permissions
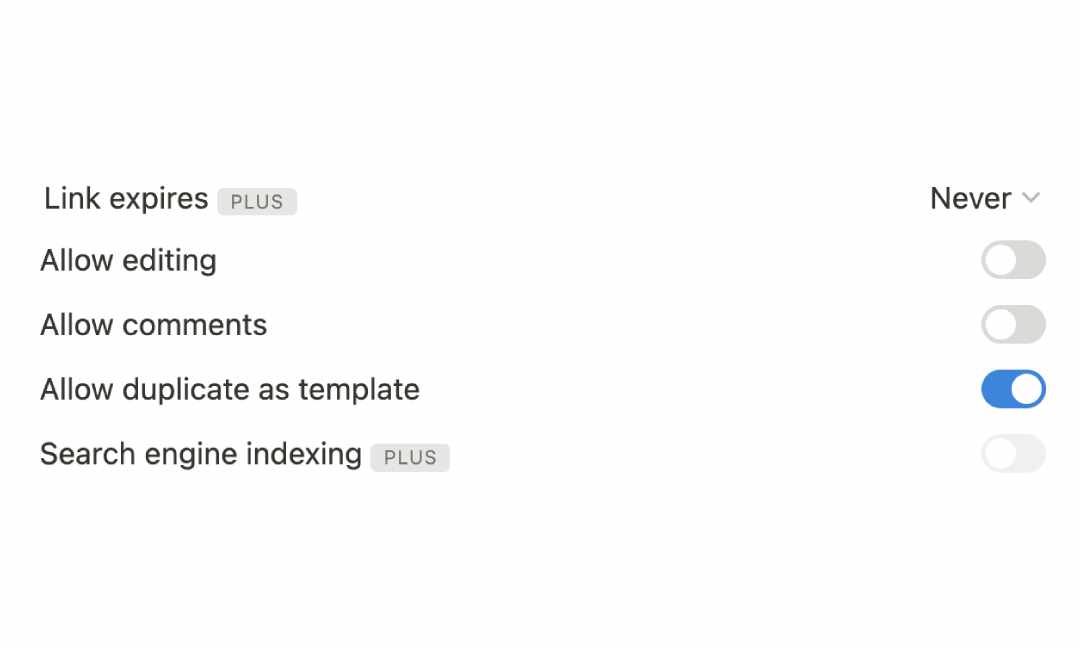
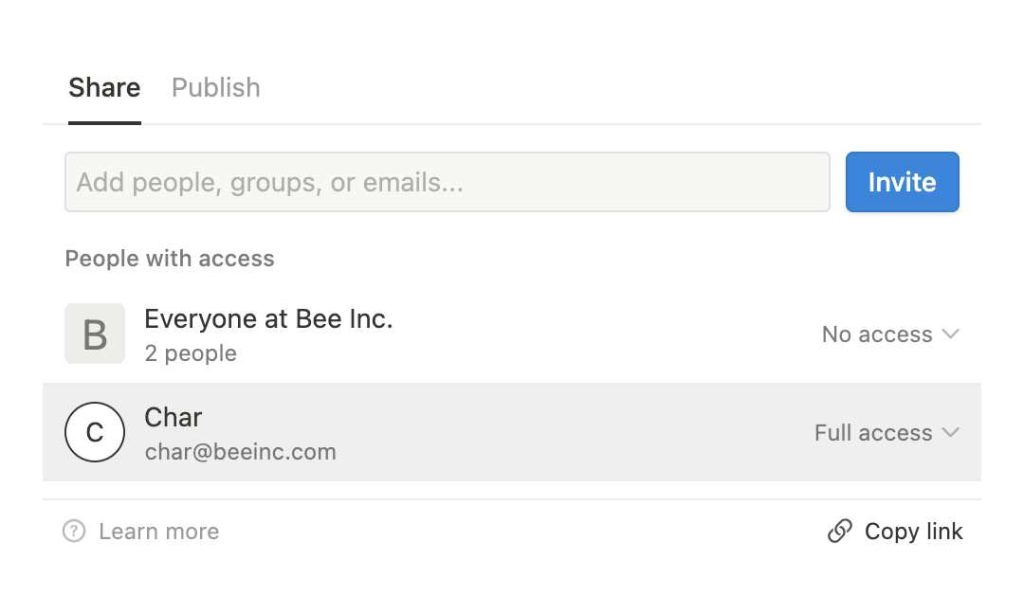
After activating the ‘Publish to Web’ feature, you’ll notice permission options appear. Here’s where you can customize the access level to your Notion page.
Want to allow editing or commenting? You can toggle these settings. There’s even an option to let others duplicate your page. Plus Plan users will find additional control options.
Adjust these settings to fit your needs.
Step 4: Share the Link
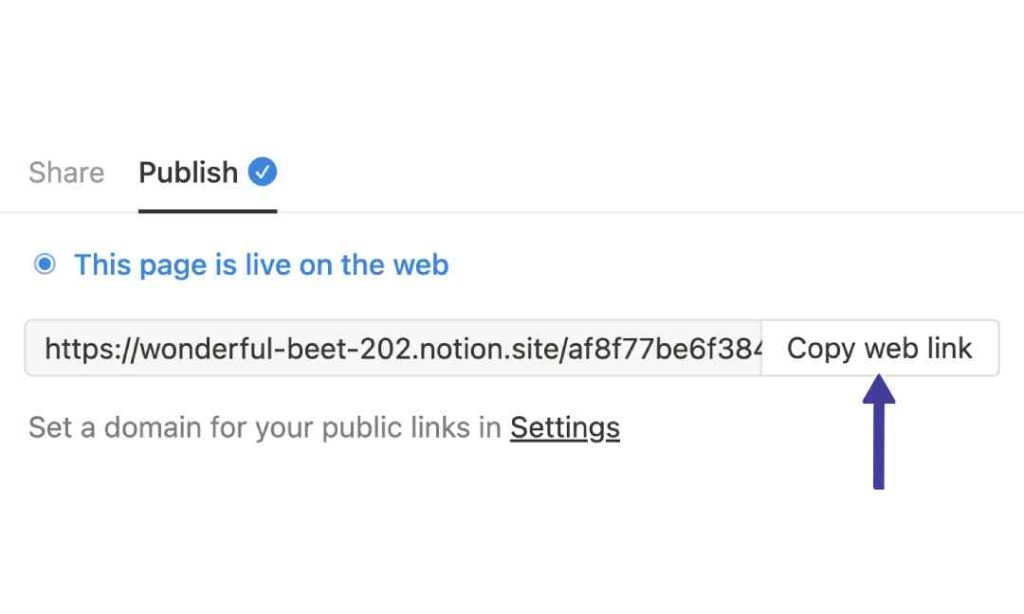
After setting the permissions, it’s time for the final step: sharing your page. This is the URL that will take people straight to your Notion page. Just click on the ‘Copy Web Link’ button.
But be careful not to confuse it with the ‘Copy Link’ button in the Share tab – that’s solely for sharing with logged-in users.
Now that you have the URL, you’re ready to share your Notion page with the world.
2. Alternate Methods
In this section, we’re going to take a closer look at two lesser-known ways to share Notion page without login details.
These methods come with their own perks and drawbacks, which may explain why they’re not as popular.
My hot take? They can offer unique sharing features that the ‘Publish to Web’ option lacks.
PDF Export
One such method is the use of ‘PDF Exports’.
The ‘PDF Export’ feature in Notion is incredibly user-friendly. It converts Notion pages into a PDF document that you can share with anyone.
This way, people who don’t have Notion accounts can still access the information. It’s essentially a hassle-free way to communicate your message without requiring the recipient to log in.
Pros:
- Accessibility: You can email, print, or send the PDF via any platform. It’s a universal way to share your work.
- Permanent Record: Once a page is exported to PDF, the content becomes static and cannot be edited. The content stays the same, no matter when or where it’s opened.
Cons:
- Limited Interactivity: Unlike live Notion pages, PDF exports do not support interactive elements like live drawings, toggles, databases, or embedded content, limiting the user experience.
- Formatting Issues: Notion’s unique layout and features may not translate perfectly into PDF format, potentially distorting the original design.
Method:
- Start by opening the Notion page you’d like to share.
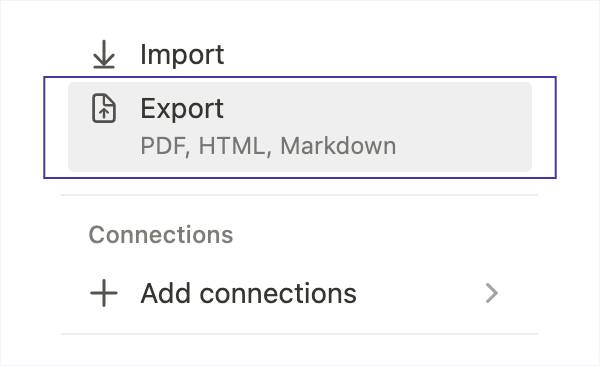
- Look in the top right corner and click on the “three dots” for more options.
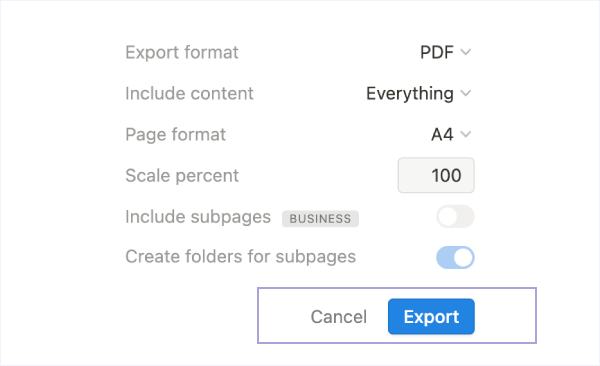
- In the dropdown, click on “Export”, then select “PDF” as your format.
- Once your PDF is ready, you can share it via email or any other platform. This allows anyone to view your content, even without a Notion account.
Embedding to a Website

Now, let’s explore the last method: ’embedding’ (1). This feature allows you to integrate a Notion page into your website.
Basically, your Notion page becomes part of your site, accessible to all visitors. This feature broadens the scope of your content, making it available to a larger audience, regardless of whether they have a Notion account or not.
Let’s explore its benefits and drawbacks.
Pros:
- Reach: Embedding a Notion page to a website allows anyone with the link to access it, increasing its visibility.
- Real-time Updates: Unlike PDFs, embedded Notion pages reflect real-time changes, ensuring viewers see the most updated version.
Cons:
- Technical: Embedding requires basic knowledge of HTML and access to your website’s back end, which may not be your thing.
- Layout Issues: Depending on the complexity of the Notion page and the website’s design, embedding might lead to formatting or layout issues
- Speed Issues: If your Notion page is heavy with data, it might put a drag on your website’s speed.
Method:
- Open the Notion page you want to share. Click the “Share” button in the top-right corner, then click the “Publish to Web” option to enable it.
- Copy the generated URL.
- Access your website’s back end and locate the HTML section where you’d like to embed the Notion page.
- Paste the copied URL within an iframe tag and save your changes. Your Notion page should now be visible on your website without requiring a login.
Why Share Notion Pages Without Logins?
You might wonder why someone would want to share Notion pages with unfettered access. It’s really not as strange as it might seem. There are surprising benefits related to easier collaboration and wider accessibility.
Here are a few real-life and logical reasons behind this choice.
1. External Collaborators
Sharing Notion pages without login requirements is a real boon for external collaborators.
Think about it – you’re working with partners, freelancers, or clients who aren’t on Notion. Sharing pages this way allows them to get the info they need or contribute without any fuss.
2. Sharing a Portfolio
Additionally, sharing Notion pages without logins enables users to broadcast their portfolio to a wider audience. It’s a fantastic tool for artists and creatives to display their work.
By allowing unrestricted access, your designs, writing samples, or project summaries can get maximum exposure. This simple tweak opens doors, as potential employers, clients, or collaborators can view your work without owning a Notion account.
HOW-TO: Export Notion Table Or Database To Excel
3. Public Information
Public Notion pages are a big help when you are part of an organization wanting to share information with a lot of people.
Let’s say you’re a teacher wanting to share resources with your students. Just put the info on a Notion page and share the link, no login is needed.
It’s quick, simple, and saves everyone time. Companies and community groups also find it handy for sharing news.
Protecting Your Shared Notion Pages (a PSA)
Trying to figure out if your shared Notion pages are truly safe? Let’s get into that in this section, where I’ll go through a variety of security measures.
I’ll show you a few tips on how to keep your shared information secure, giving you peace of mind.
Limit Permissions
Here’s a tip from my own experience with Notion. Be cautious about the permissions you assign to your published pages. It’s simple: less access means less risk.
Decide who gets to read, comment, or edit. It’s a straightforward way to add a layer of security.
Next time you share a page, remember to be selective with your permissions.
Don’t Share Sensitive Info
When using Notion, play it safe, and don’t put sensitive information out there. Even with limited permissions, once it’s out there, it’s tough to control where it goes next.
It’s smart to use Notion’s permission settings, but also use your own good judgment when sharing. This two-fold approach to security is your best bet!
YOU MAY LIKE: How To Create Private Pages In Notion
Use Exports Instead
As a last resort, consider using Notion’s ‘Export to PDF‘ feature for more control.
It’s a neat little trick that lets you share your work without giving direct access to your Notion page. You just export your page as a PDF, then share that file.
This way, you have complete control over who gets to see your stuff.
Wrapping It Up
We’ve explored various methods to share Notion page without login details, covering the pros, cons, and step-by-step procedures for each.
No matter which method you choose, consider the nature of your content, your audience’s technical capabilities, and most importantly keeping an eye on security.
So, always remember to adjust your permissions carefully and refrain from posting sensitive information before sharing publicly.
Before writing an article, we carefully research each topic and only share information from reputable sources and trusted publications. Here is a list of the sources used in this article: