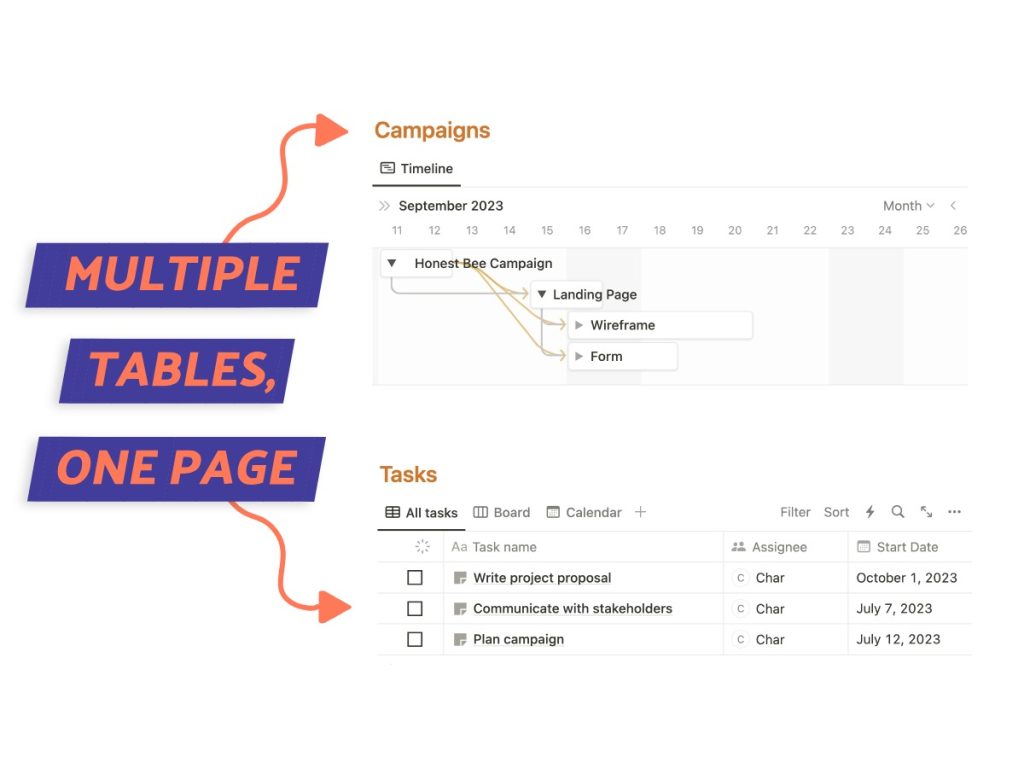
The struggle is real when it comes to figuring out how to add multiple tables in Notion on just one page!
I was just recently down that rabbit hole, spending more time than I’d like to admit wrestling with adding multiple Notion tables.
But good news: I’ve figured it out (it’s embarrassingly simple) and I’ll walk you through the whole process, saving you from the trial and error that ate up my afternoon.
What We Will Cover
Understanding Notion Inline vs. Full Page Tables
Before we jump into the how-to, it’s crucial to understand the difference between inline and full-page tables in Notion. This distinction is vital when you’re planning to add multiple tables to a single page!
Inline tables allow you to add other types of content around them, offering more layout flexibility.
Full-page tables occupy the entire page, leaving no room for additional content. This limitation is the stumbling block for many users (myself included) when trying to add multiple tables to a single page.
How Do I Add Multiple Tables To One Page in Notion?
You might be wondering why anyone would even want multiple tables on a single Notion page. The answer lies in better data presentation and organization.
If you’re managing various projects, laying out your weekly plans, or sorting through resources, the ability to have multiple tables can change your life.
In this upcoming section, I’ll guide you through each step of the process of adding multiple tables to a Notion page.
Step 1: Use Existing or Create a Notion Page
If you already have a specific page where you want to add tables, go ahead and open it.
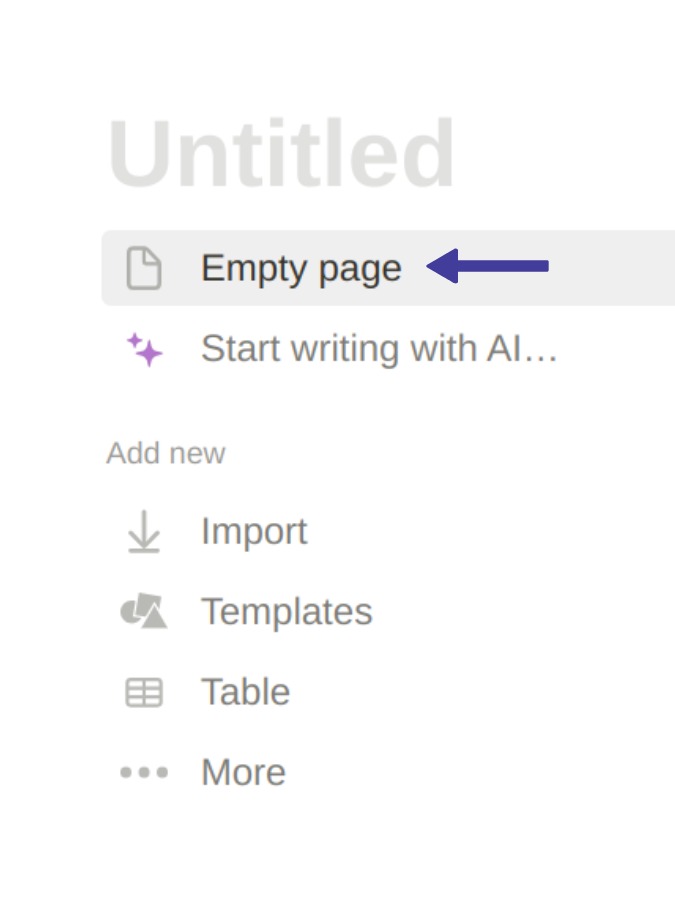
But if you’re starting from scratch, that’s perfectly fine too. Just click on the “+ New Page” button, give your page a name, and you’re all set. You now have a blank canvas to work with.
Step 2: Load Up the Notion Blocks
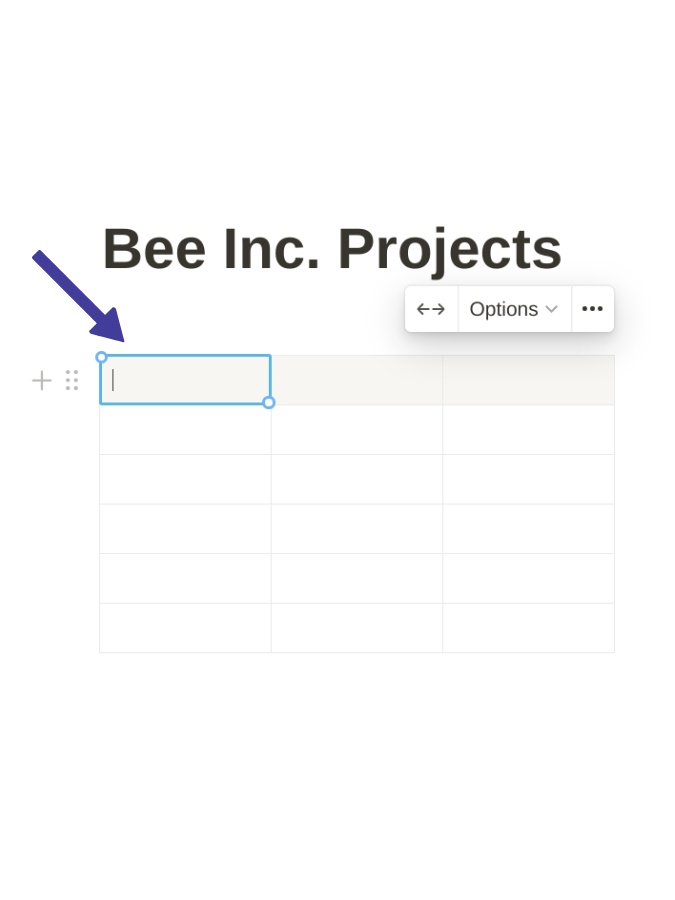
Let’s get to the exciting part—adding your first table.
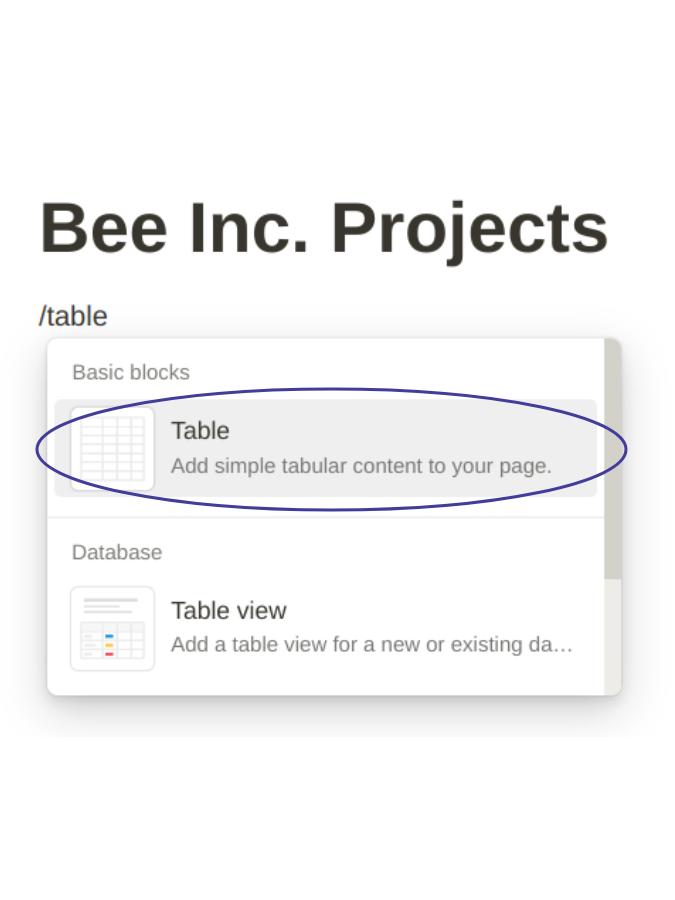
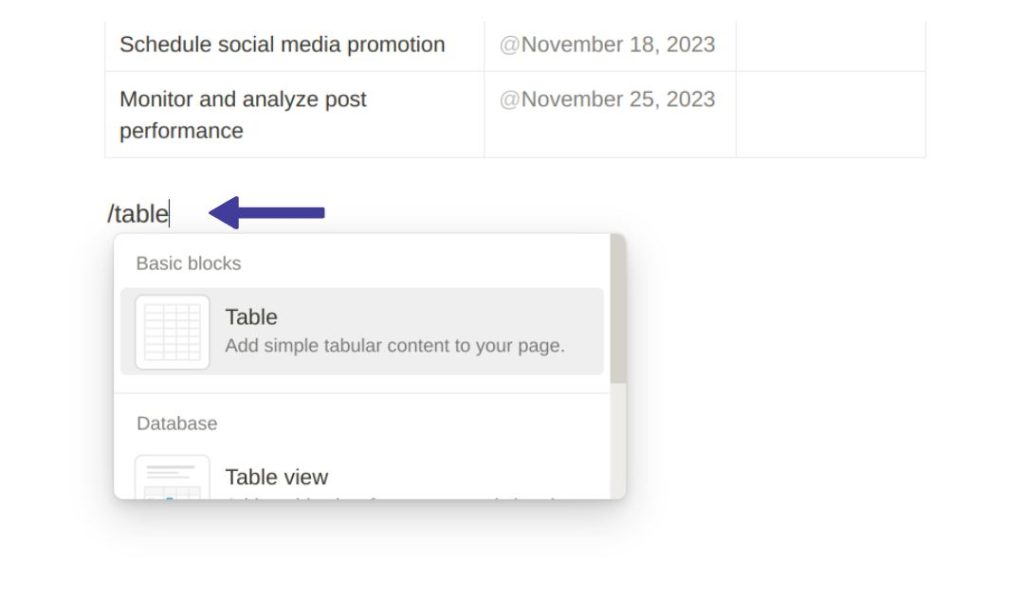
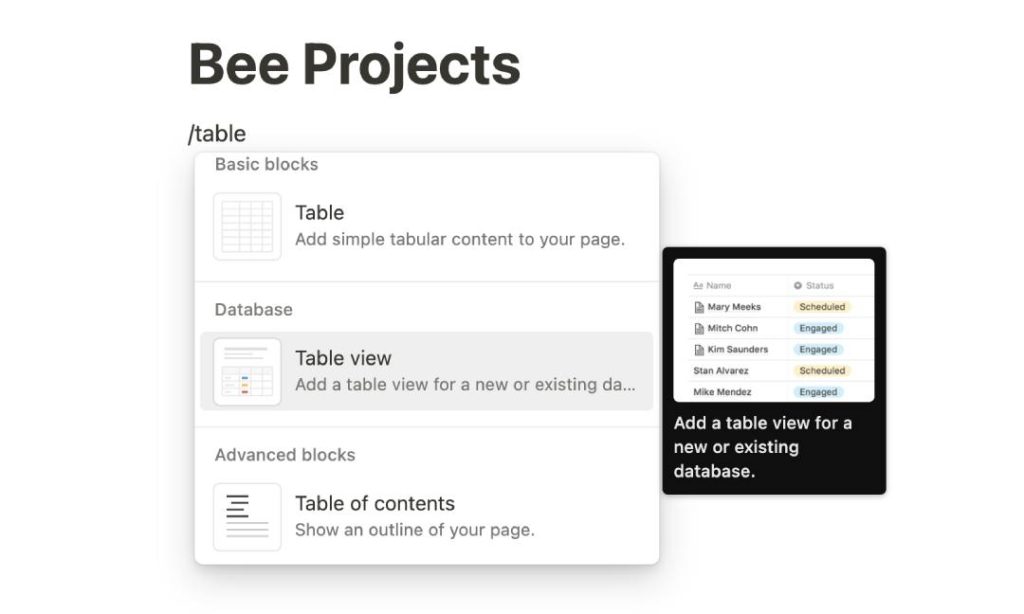
Move your cursor to the spot on the page where you envision your table sitting. Type “/table” and a menu will appear with options.
GOOD TO KNOW: Notion Block Limit & Why They Matter
Step 3: Add a Table
You’ll see several choices related to tables.
If you want the ability to add multiple tables in Notion, DO NOT go for ‘full-page database’.
Let’s start with ‘simple table’ and go from there.
Step 4: Customize the First Table

You’ve got your first table in place, but it’s looking a bit bare, isn’t it? Time to give it some character.
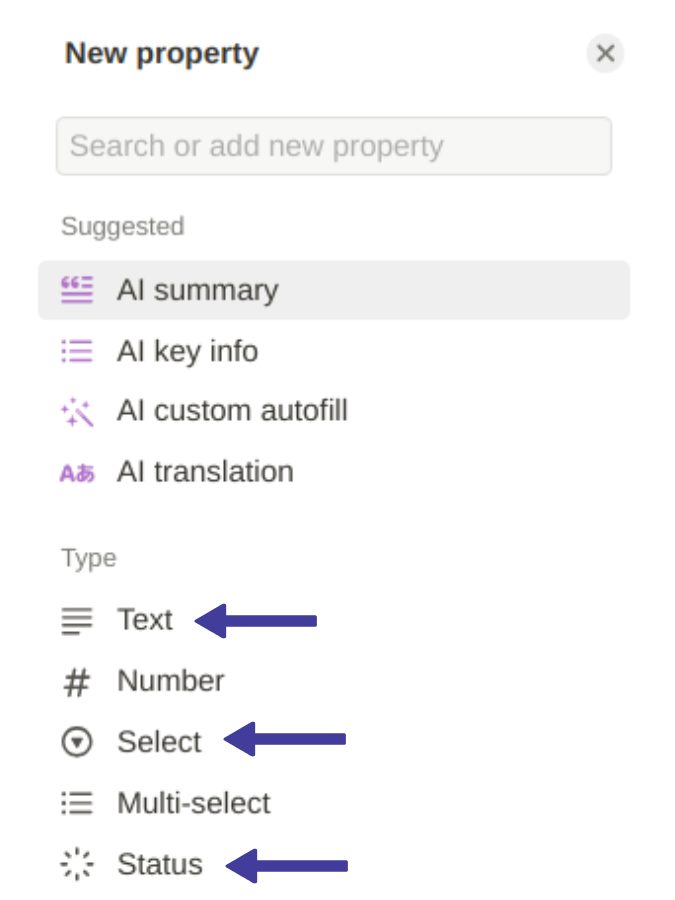
You can start by adding columns that suit your needs. Maybe you’re tracking a project, so columns like ‘Task’, ‘Deadline’, and ‘Status’ would be helpful.
Once you’ve decided on the columns, you can set their property types like ‘text’, ‘number’, or ‘date’.
Step 5: Add the Second Table
Feeling good about that first table? Great, because we’re not stopping at one.
To add another table, move your cursor to a new section of the page. Then, it’s just a matter of repeating Step 2.
Type “/table,” choose your preferred table type and you’ve got your second table.
Step 6: Organize Your Tables
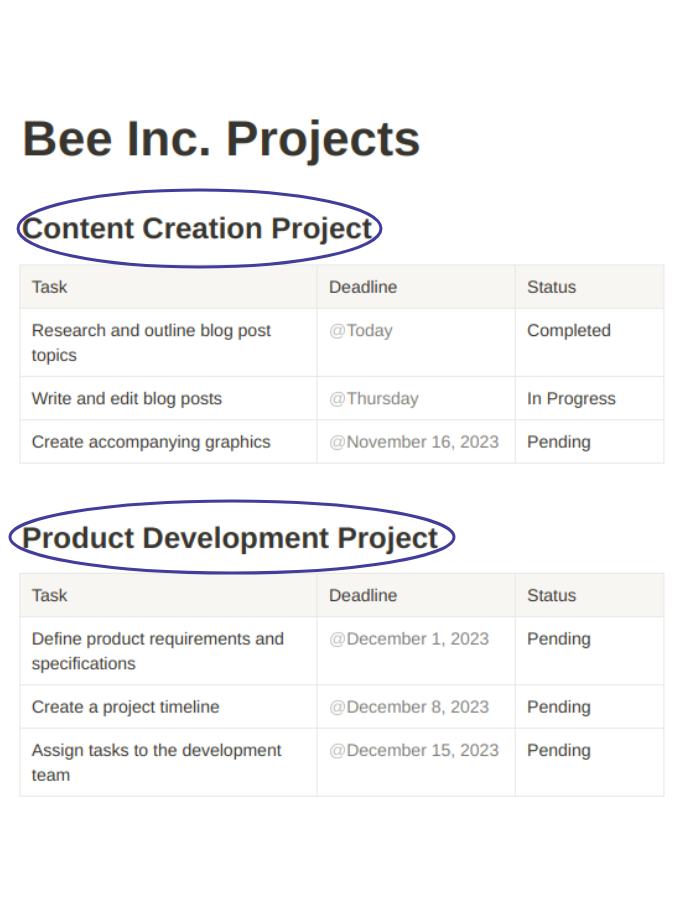
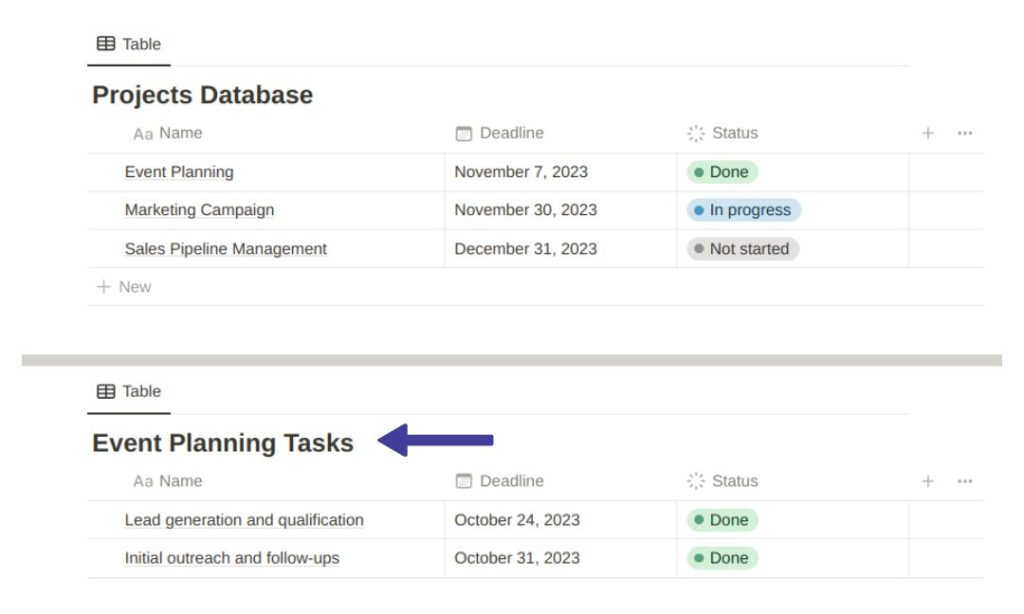
By now, you’ve got all your tables set up, but presentation is key.
If you want to keep things tidy, consider adding titles or short descriptions above each table.
This way, you’ll know exactly what each table is for, making your life a whole lot easier.
How To Add Multiple Tables In Notion: Databases
After you’ve got your simple tables set up, you might be thinking, “I know how to add multiple tables in Notion but what about databases?” Good news—you can add those too, and it’s just as straightforward.
Stay with me as I break it down for you below.
Step 1: Add Your First Inline Database
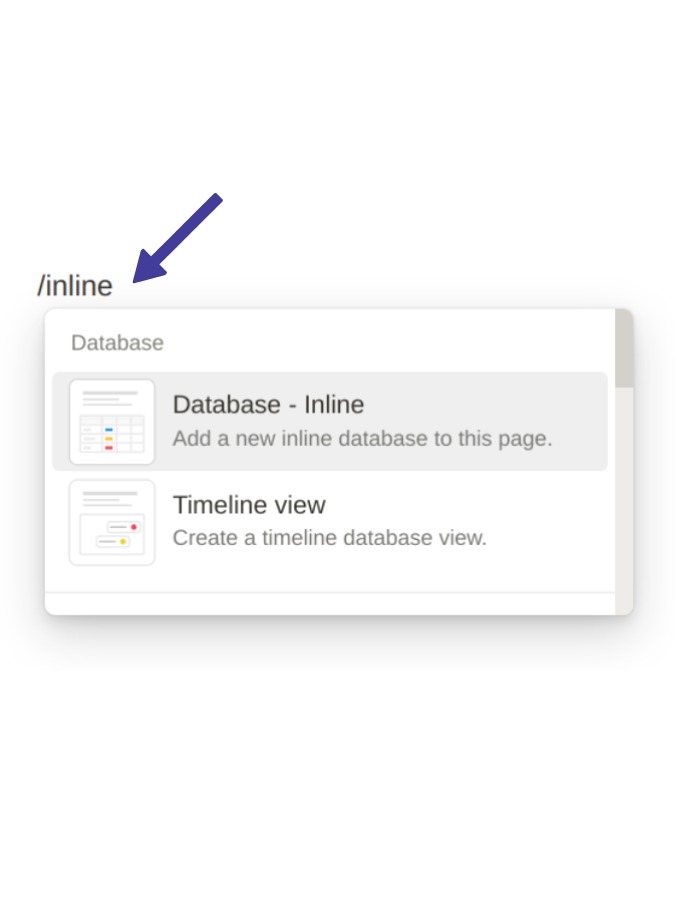
Place your cursor where you’d like the first inline database to be.
Type “/inline” and you’ll see two database options. Pick ‘Database – Inline’.
Select it, and you’ve just created your first inline database right there on the page.
Step 2: Customize the Inline Database
Now that your inline database is in place, it’s time to give it some structure.
You can add properties like ‘Name’, ‘Category’, or ‘Status’ depending on what you’re using the database for.
Notion allows you to set property types such as ‘Text’, ‘Multi-Select’, or ‘Person’, giving you the flexibility to tailor the database to your specific needs.
Step 3: Add More Inline Databases
If one inline database is good, more must be better, right? To add another, simply move your cursor to another part of the page and repeat Step 1.
Each inline database can be customized independently, so feel free to make each one unique according to its purpose.
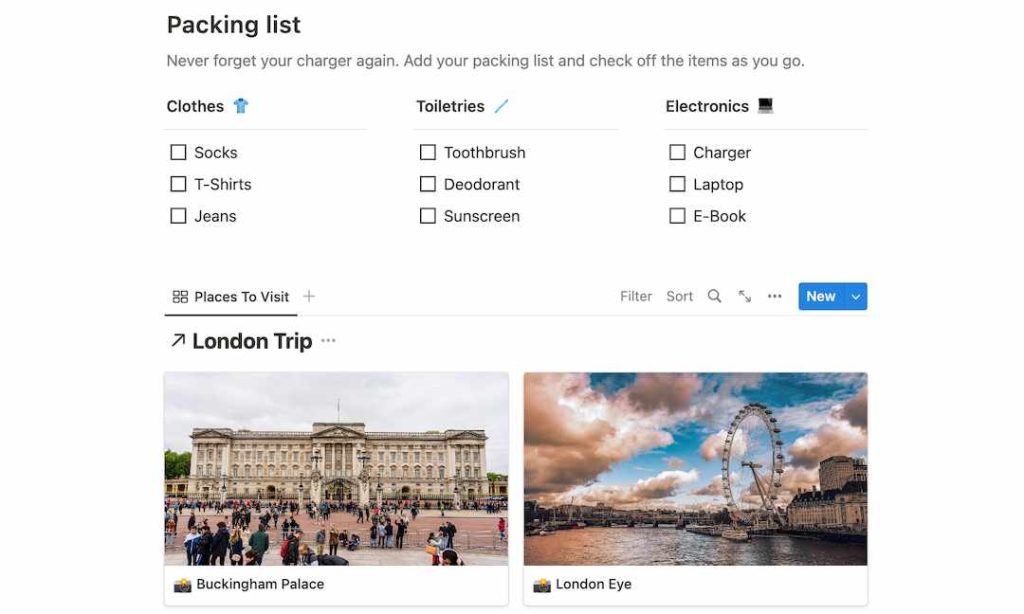
Can I Mix & Match Notion Tables
Good news—you’re not limited to just one type of table. In fact, you can mix and match to your heart’s content.
This means you can place a simple Notion table right next to an inline database, or even stack two inline databases on top of each other.
What If You Want To Add An Existing Database
What if you already have a database that you’d like to include on your page? No worries, you can do that too. Instead of using an inline database, you can opt for the Table View feature.
Let’s explore more below.
Step 1: Add Table View
Once you figure out where you’d like this existing database to sit on the page, type ‘/Table View’ into the command line.
Go ahead and select it. This feature allows you to bring an existing database right into your current page but with a fresh table view.
Step 2: Pick Your Existing Database
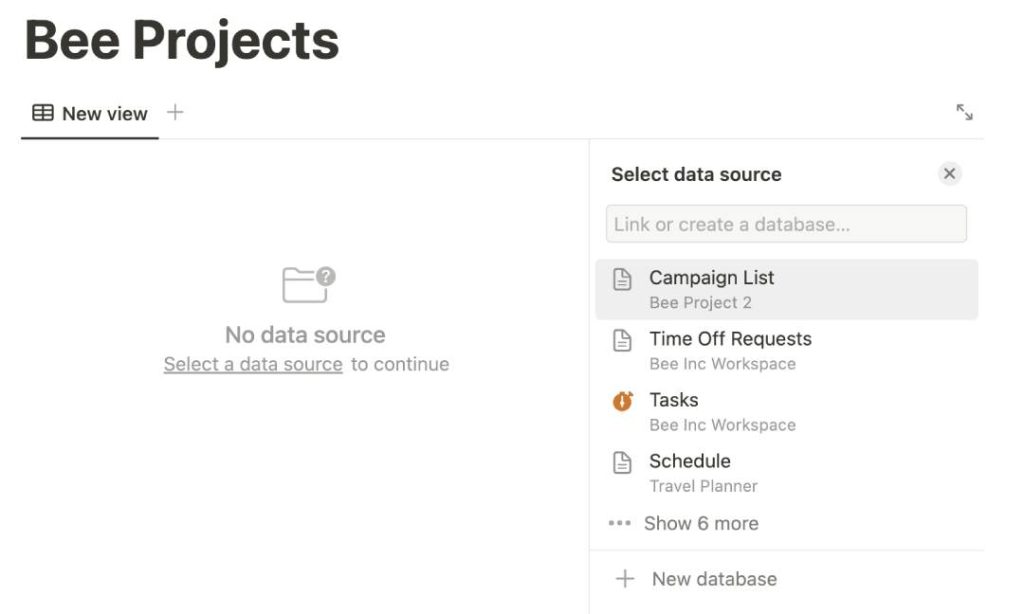
After you’ve clicked on ‘Table View’, a database will pop up.
On the right side, look for the database you want to add. Or, type in the name of the database you’re looking to add.
Once you find it, click to select. Your chosen database will now appear as a table, right next to other tables
Step 3: Tailor Your Database (Optional)
Last but not least, let’s give this table view your personal touch.
Even though it’s an existing database, you have the freedom to customize its appearance on this page.
Whether you want to change its layout, add or hide columns, set up specific filters, or sort entries in a particular way, the world is your oyster. And don’t worry, these changes are page-specific and won’t mess with your original database.
Expert Tips On Managing Multiple Tables In Notion
Now comes the final installment of our in-depth guide, where we’ll explore pro tips on managing multiple tables in Notion.
If you’ve ever felt swamped by an array of tables and databases, you’ve come to the right place.
I’ll share some advanced techniques that will make handling multiple tables in Notion both efficient and straightforward.
Move Tables Around
First on our list of tips for managing multiple tables in Notion is mastering the skill of table placement.
Yes, you’re never locked into your initial table setup! Notion gives you the freedom to move tables around, a feature that becomes incredibly useful when you’re working with multiple tables.
Whether you’re fine-tuning your workspace or making room for new data, the ability to reposition tables is essential for presentation.
Create Templates
If you find yourself using the same table structure repeatedly, consider creating a template.
This way, you can create multiple tables with a single click, already formatted to your needs.
Even though Notion offers a range of ready-to-use templates, (1) I find the real advantage comes when you design custom ones to fit your unique needs.
HOW-TO: Create Notion Table Templates
Convert Table Types
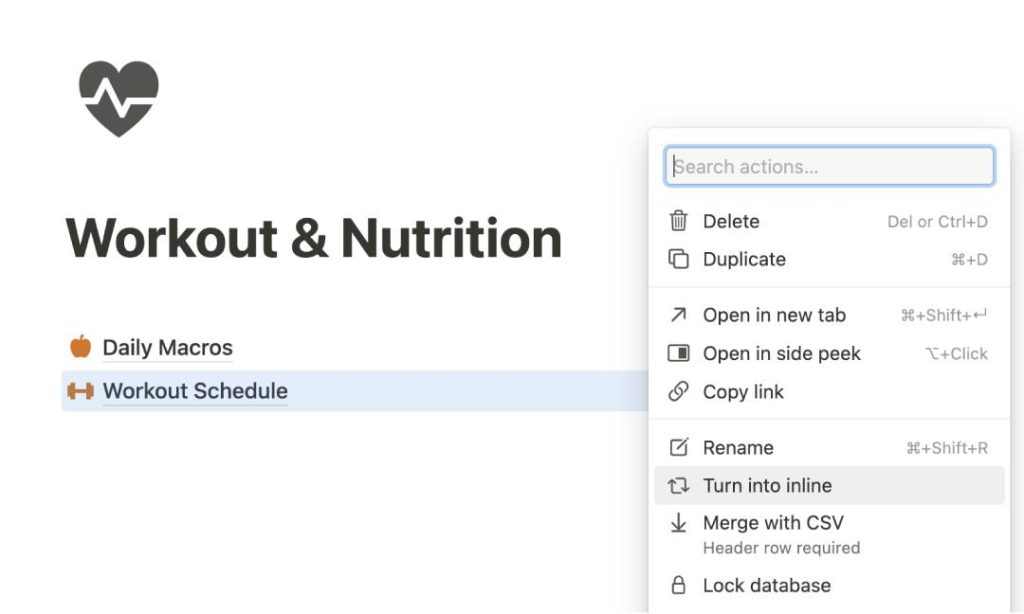
Perhaps you started with a full-page database but later realized an inline table would be more suitable.
You guessed it. You have the option to switch table types so that they fit in better with other tables on your page.
Use the instructions in this link to learn how to swap between inline and full-page databases.
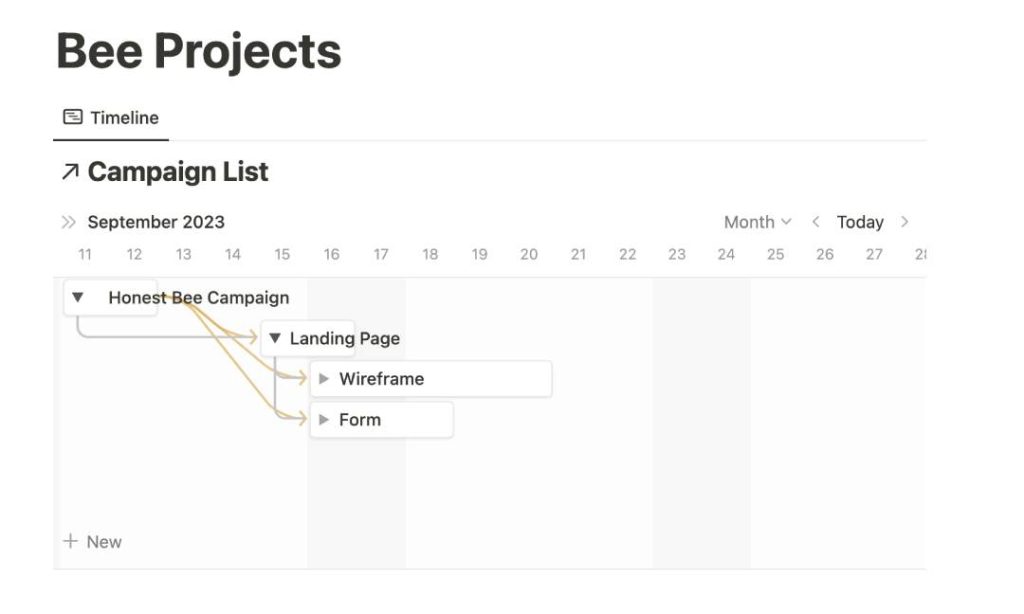
Create Relational Links
Managing multiple tables in Notion can sometimes feel like a high-wire act, but relational links are here to give you some balance.
This feature acts like a bridge, connecting data from one table to another.
You might have one table listing all your clients and another detailing their purchases. With relational links, you can effortlessly connect the dots, making it feel like your tables are actually talking to each other.
Less Is More
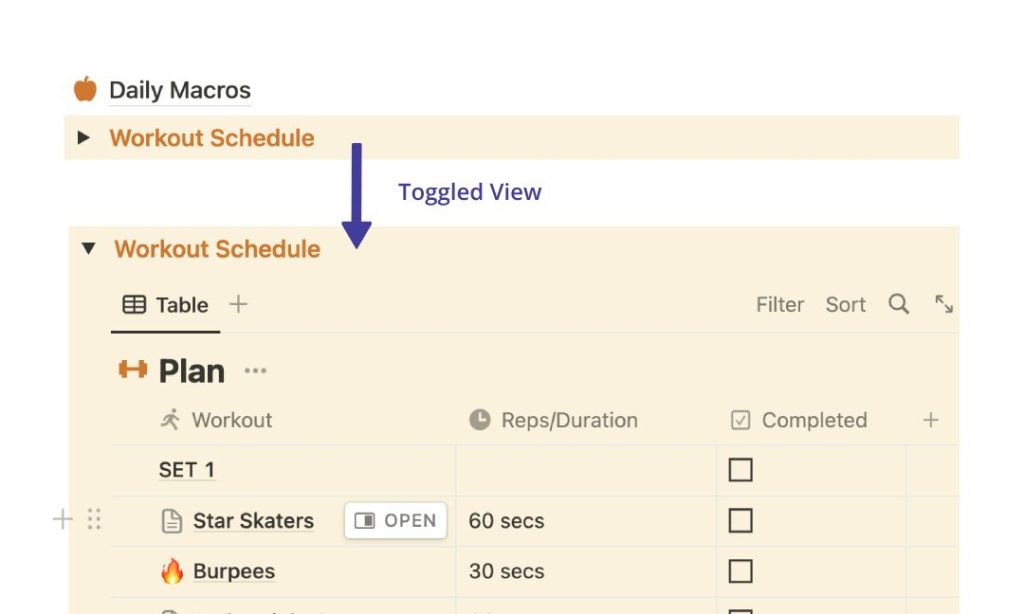
You might be thrilled to know that Notion doesn’t limit you on the number of tables you can add to a page.
But hold on, more isn’t always better. If you go overboard, you could end up with a cluttered page that’s hard to navigate. If you’re dealing with large tables filled with data, this becomes even more critical.
A good workaround? Use toggles to hide some tables, keeping your workspace neat and your mind clear.
Putting it Together
In wrapping up this step-by-step tutorial, you now have the tools and know-how to add multiple tables in Notion like a pro.
From mixing and matching tables to seamlessly integrating existing databases, you can organize your data in a way that suits you best.
Remember, the key to effective data presentation in Notion is not just adding as many tables as you can, but doing so in a way that makes sense to users.
Before writing an article, we carefully research each topic and only share information from reputable sources and trusted publications. Here is a list of the sources used in this article:
- Notion: https://www.notion.so/templates