Want to make your Google Form to Notion integration happen for free? Great news: you can achieve it without spending a dime.
In this blog, I’ll guide you through in-depth steps to get your Google Form responses perfectly integrated into your Notion workspace. Stick around to find out how!

What We Will Cover
Is There A Google Form To Notion Integration?
Wouldn’t it be fantastic to simply click a button and have Google Form chat seamlessly with Notion?
Unfortunately, there’s no official, one-click solution to directly connect these two platforms. But not to worry; we’ll manually bridge the gap with some straightforward steps.
It’s sort of like assembling a piece of IKEA furniture; just follow the instructions, and you’ll get there.
Part 1: Embedding Google Form In Notion
Let’s start with embedding your Google Form into your Notion workspace. I’m using the example of a ‘time off request form’ for our tutorial.
This part is fairly uncomplicated, requiring only a handful of steps. Stick with me, and soon enough, your Google Form will nest comfortably within your Notion workspace, making the space even more functional.
Step 1: Load Up Your Form
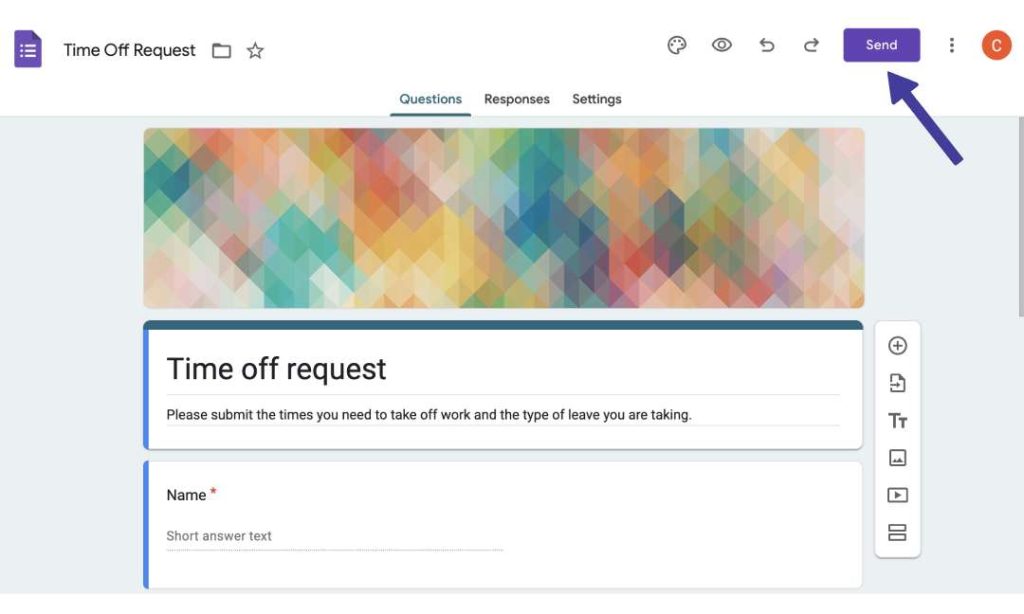
Head over to the Google Form you want to display in Notion.
Look out for the “Send” button at the top right (see screenshot above). Give it a click and let’s jump over to the next step.
Step 2: Copy Embed HTML
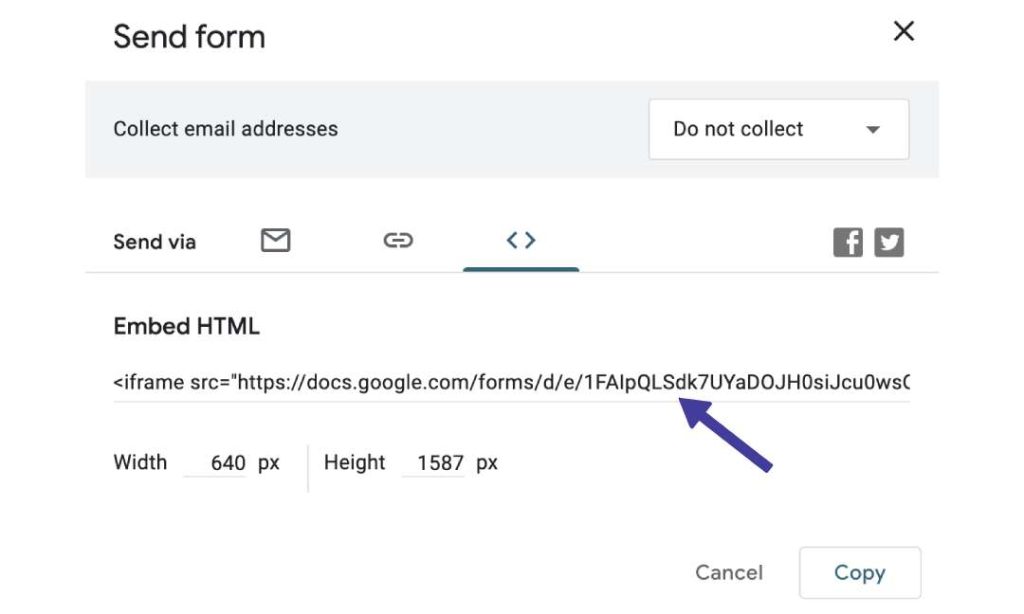
A new menu should appear displaying different ways to share the form.
Find the icon that resembles angle brackets (“< >”). This action will reveal the “Embed HTML” section. A line of code will be displayed; this is the URL you need.
To copy it, either click the text or use the “Copy” button located at the bottom-right of the pop-up.
Step 3: Create Embed Block In Notion
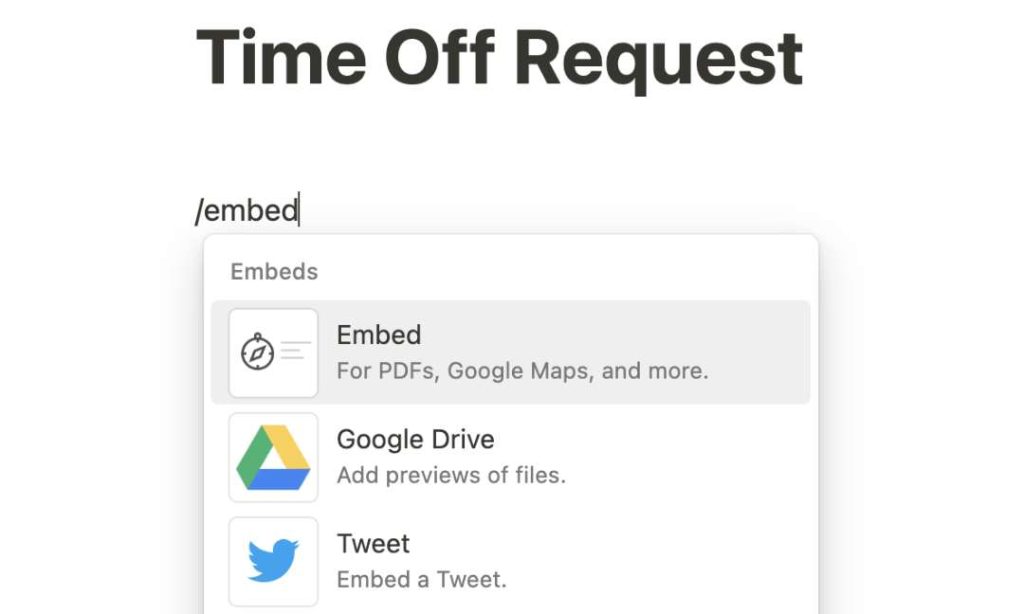
Let’s head over to your Notion workspace.
Open the specific page where you’d like to feature your Google Form. Here, you can create a new “Embed” block by typing “/embed” or just typing “/” and then scrolling until you find “Embed“.
Clicking that adds the new block to your page, prepping it for the final step.
Step 4: Paste Embed HTML
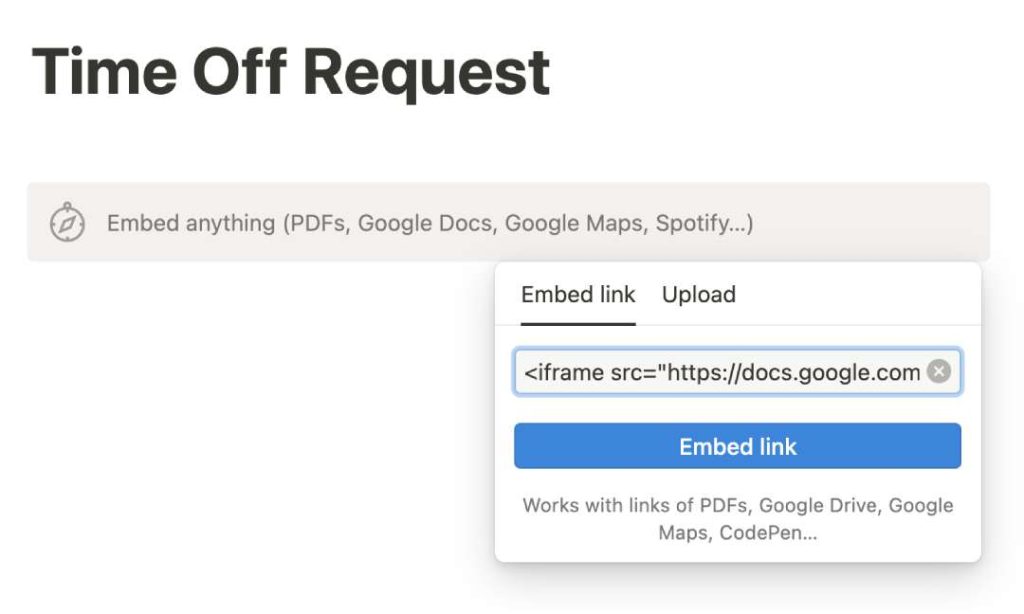
With your “Embed” block set up, paste the URL you copied from Google Form. Congratulations, your Google Form should now be visible and functional on your Notion page!
If you’re just looking to embed your form in Notion, you can certainly stop here. Now if you want to collect form responses in your Notion database, keep reading Part 2 below.
HOW-TO: Embed Iframes In Notion
Part 2: Capturing Responses From Google Form to Notion Database
Alright, who’s ready for Round 2? Continuing with our ‘time off request’ scenario, we’re going to learn how to get those Google Form responses into a Notion database.
But hang on, we can’t do this solo; we’ll be using Make(1), a third-party platform that connects various apps using workflows.
Before we get started, you’ll need an account on Make.com. If you don’t already have one, go ahead and register—it’s a critical step for what’s to come.
Step 1: Select Google Forms Destination For Responses
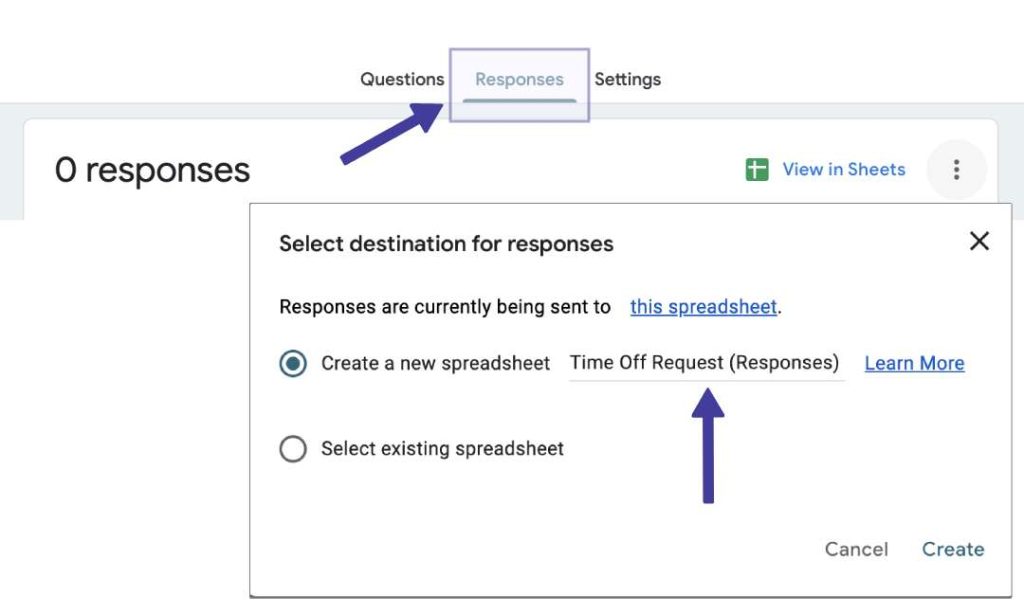
First up, open Google Forms and go to the Responses tab. Look for those three little dots in the corner and click on them.
A drop-down menu will appear. Go ahead and select “Choose destination for responses.” Decide where you want your responses saved, and keep that location somewhere handy since you’ll be needing it later.
Step 2: Use Make’s Pre-Made Template
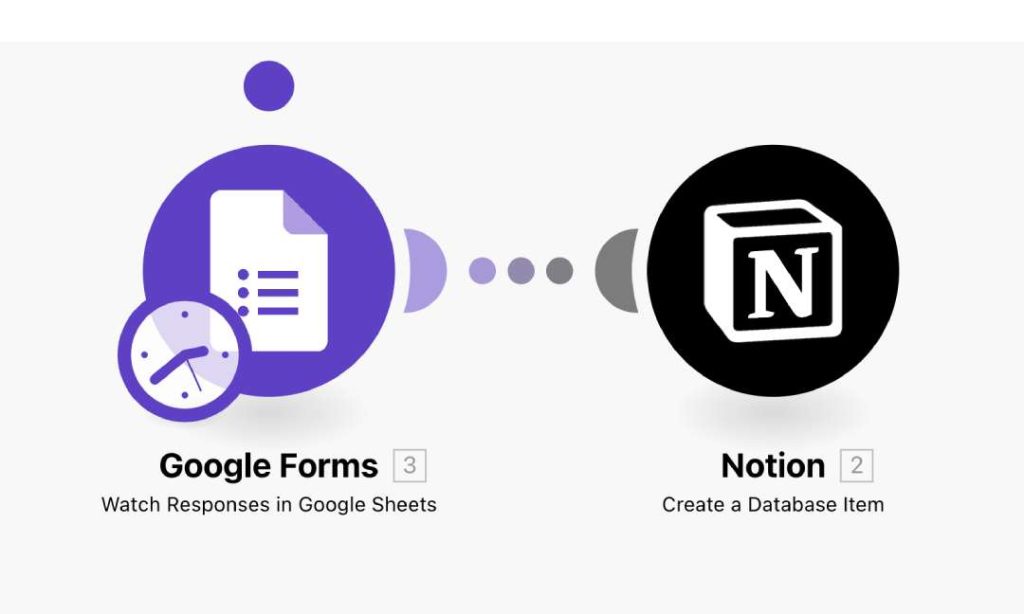
Time to shuffle on over to a new platform. Use this specific Make template: Google Forms To Notion.
This template has a built-in workflow to shuttle your responses straight into Notion. No need to start from scratch.
Step 3: Connect With Google Forms
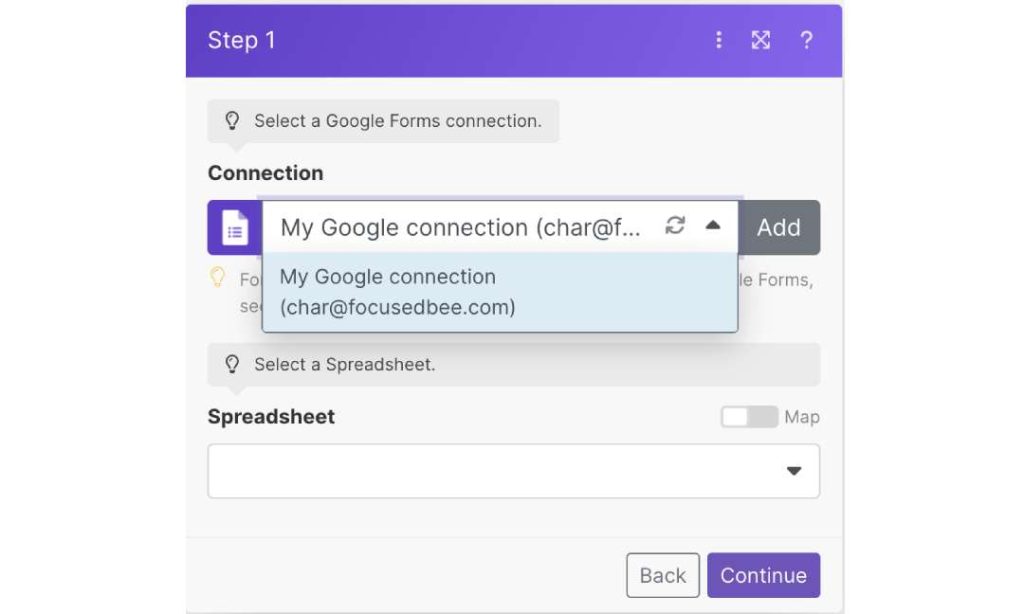
Now hit the ‘Add’ button to select which Google account you want to sync with Make.
It’s crucial that you choose the same Google account where your form is housed. Doing so ensures that everything lines up just the way we want it to.
Step 4: Choose Spreadsheet To Connect To
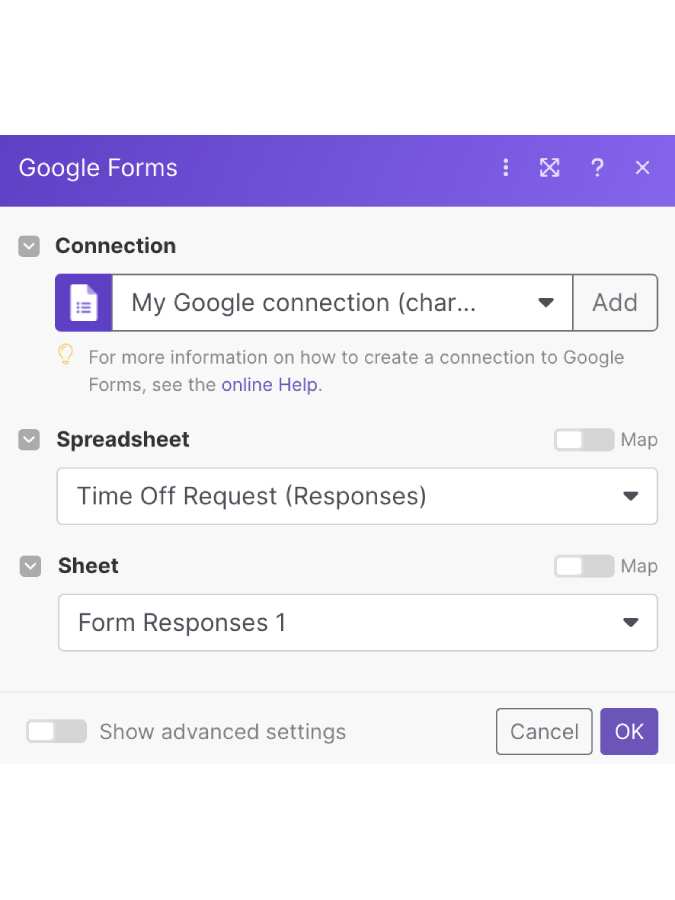
With your Google account linked, it’s time to clue Make in on which spreadsheet it should be pulling the responses from.
Yes, pick the very same spreadsheet you chose to save responses to back in Step 1!
You’ll also get a prompt to pick a specific tab within the spreadsheet. Go ahead, make your choice, and then click ‘Continue’.
Step 5: Connect To Notion
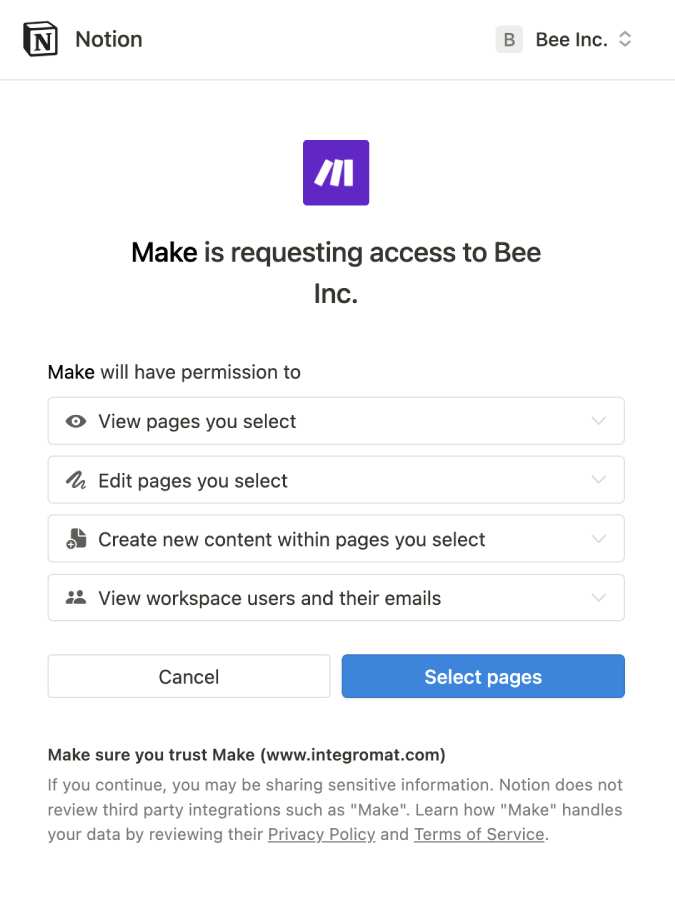
Now let’s get Notion in on the action.
There will be a button to create a new Notion connection, just like you see in the screenshot. Click it, and on the next screen, opt for Notion Public as your connection type.
Feel free to give this connection a name if you want to make it easily identifiable later on.
Step 6: Choose Notion Page
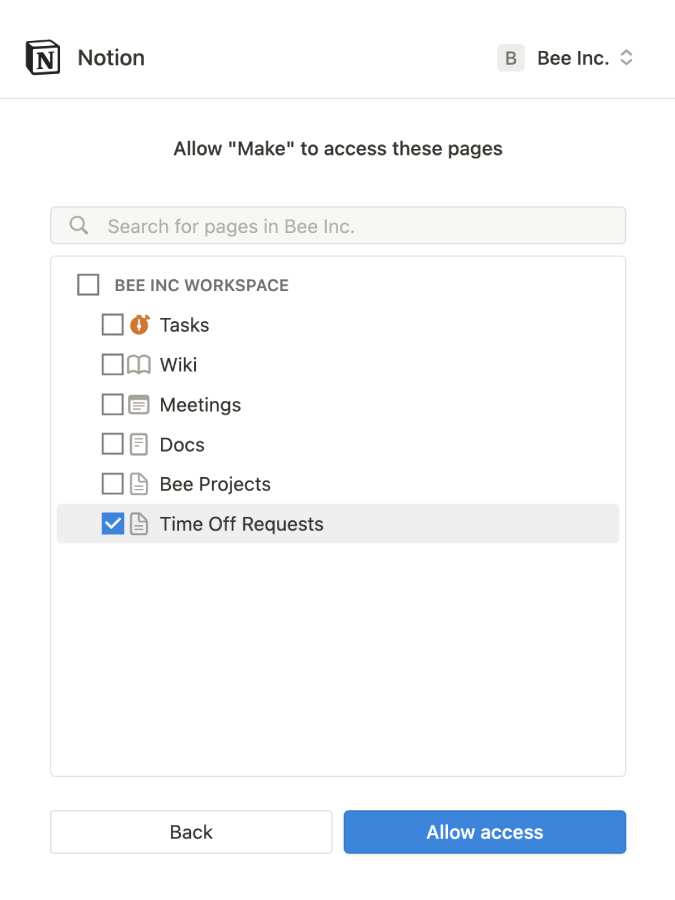
Time to specify where in the Notion workspace your form responses should land.
First, give Make the okay to interact with your Notion account. Then, you’ll see a screen where you can pick the Notion page that will become the new home for your Google Form responses.
Step 7: Choose Database
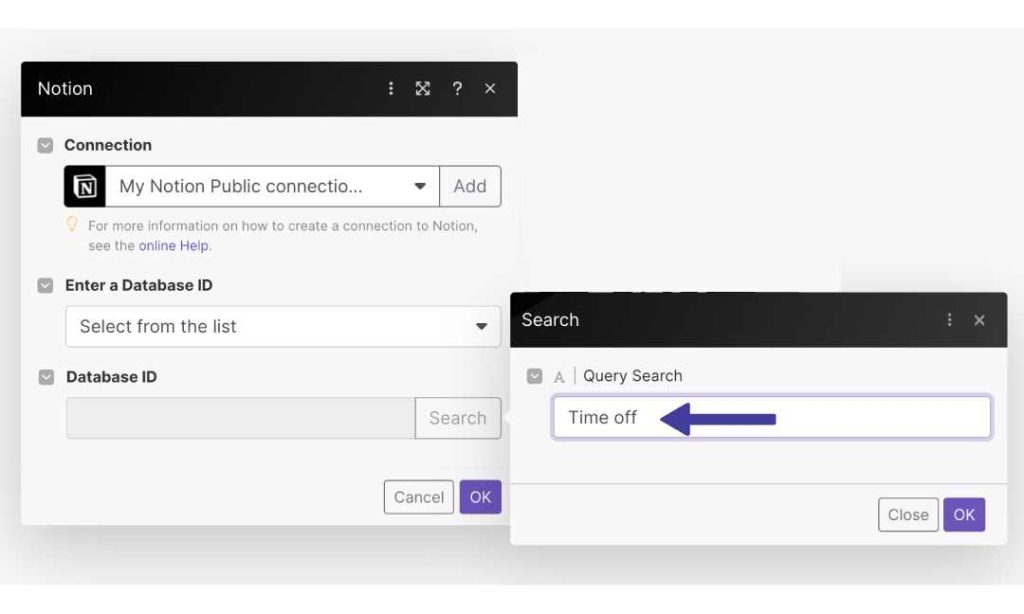
We have our page now let’s decide which database should house those form responses.
Click the “Enter a Database ID” dropdown and opt for “Select from the list.” You’ll see a search button next to the database ID field—click it and start typing the name of your database.
A quick click on ‘OK,’ and the database ID should fill itself in automatically.
Step 8: Map Database Fields

Almost there, promise! All that’s left to do is to map the fields to our Notion database.
You’ll see two lists of fields: one from Google Forms (on the right) and the other from your Notion Database (on the left). For instance, if you have a field named “Name,” you’ll want to match it with ‘Name’ on the right-hand side.
Just keep on matching until you’ve aligned them all, and then click ‘OK.’
Step 9: Test Integration
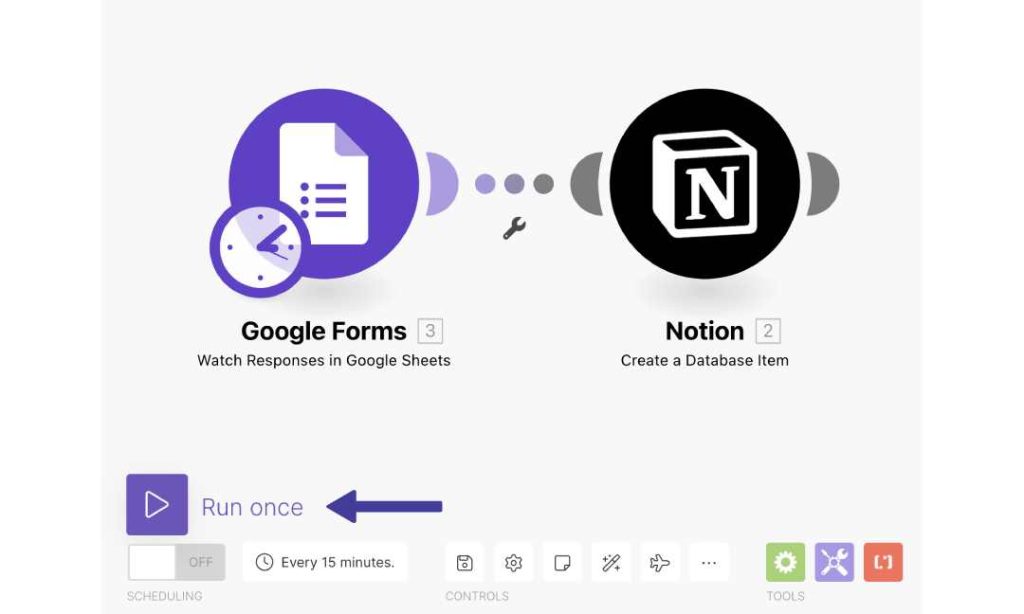
You’ve set everything up, and it’s time for a trial run. Click the “Run Once” button on the main integration page.
If something doesn’t look right, it’s usually a good idea to double-check your field mappings. You’ll want to make sure you’re not, for example, sending text to a date field.
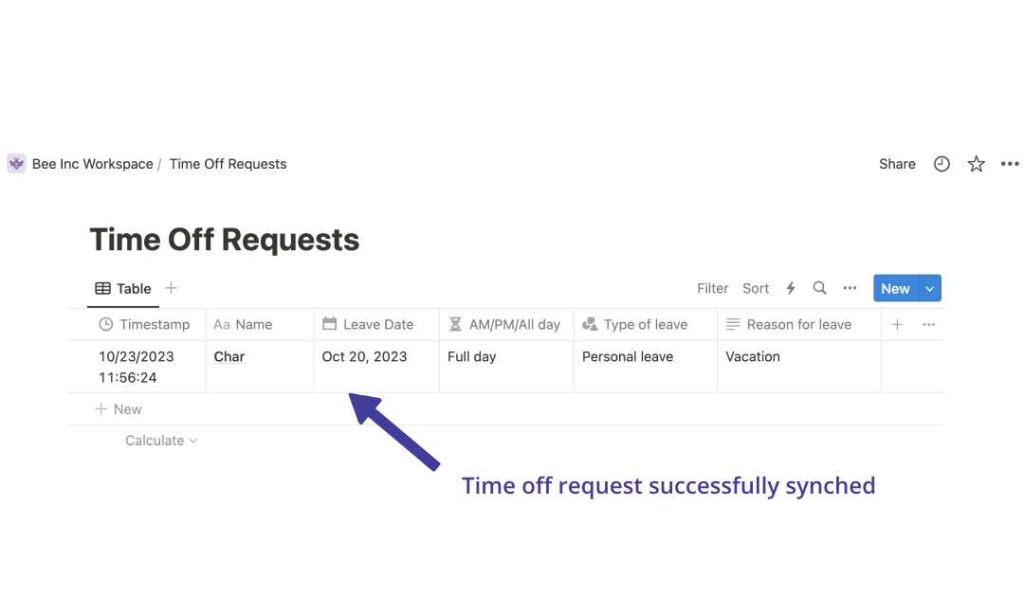
Step 10: Verify In Notion
If your test run went smoothly, save your Make scenario.
Head back to your Notion database and double-check if the form responses made it through as expected.
If all systems are a go, you can optionally decide how often Make should forward your Google Form responses to Notion. I usually set the interval to once a day, but of course, it’s up to you.
YOU MAY LIKE: How to Embed Google Sheet in Notion
Other Google Form To Notion Options
If the thought of alternative solutions gets your heart racing, I’ve got good news.
There are several platforms out there designed to connect Google Form to Notion, each bringing its unique advantages and disadvantages to the table.
Below, we’ll take a closer look at some of these, so you can choose the one that fits you just right.
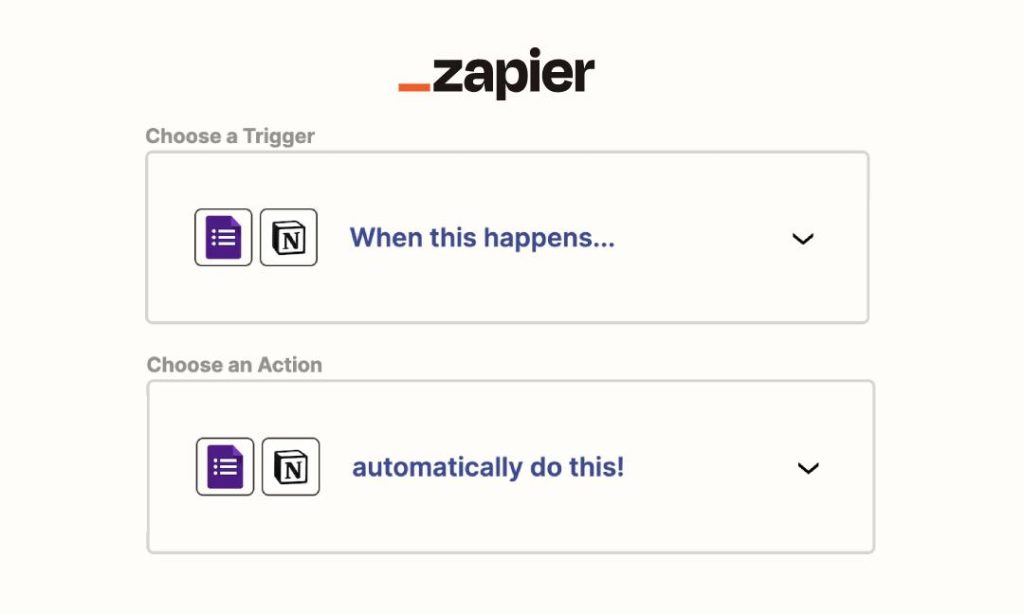
1. Zapier
Zapier might cost you a bit, but it’s renowned for its robust capability to connect and automate a variety of applications.
When you use Zapier to integrate Google Forms and Notion, you’re not just linking the two; you’re also getting the option to incorporate cutting-edge OpenAI technologies like GPT-3, DALL-E, and Whisper.
This can supercharge your automation and make your workflows even more dynamic.
2. Form to Notion
Here’s a more budget-friendly option for you.
For just $5 a month, Form to Notion can be your go-to. This Google add-on is designed with a single goal: to place your Google Form responses snugly into a Notion table.
The whole operation of automatically adding new entries is incredibly straightforward when you have Form to Notion by your side.
3. Notion API
If you’re someone with a knack for technical details, the Notion API might be right up your alley. It’s free, but it does need some technical expertise.
With the Notion API, you can connect Notion’s pages and databases to your everyday tools, creating comprehensive workflows.
Skilled developers can use it to funnel data from multiple platforms into a single Notion workspace. This reduces the time you’d otherwise spend juggling between apps and gives you a cohesive view of your projects and data.
Conclusion
Google Form to Notion may not be a one-click affair, but with a little effort, you can create a seamless integration.
Whether you opt for the comprehensive automation offered by Make or Zapier, the budget-friendly Form to Notion, or the developer-friendly Notion API, you have various paths to achieve your goal.
Happy integrating!
Before writing an article, we carefully research each topic and only share information from reputable sources and trusted publications. Here is a list of the sources used in this article:
- Make: https://www.make.com/en