The duplicate Notion workspace feature is a new-ish function that has just rolled out. In today’s blog, we’ll get into the nuts and bolts on how to use it in your workspace.
Whether you’re tackling repetitive projects, training your team, or wanting to keep your brand uniform, duplicating workspaces is a winner. Stick around to uncover how to make this trick work wonders for your workflow as it did for mine!
What We Will Cover
Why Duplicate a Notion Workspace?
I’ll start by explaining why duplicating a Notion workspace could be a big win for you.
Whether it’s deploying ready-made blueprints for recurring projects, establishing a safe haven for training, or keeping your brand’s look consistent across all teams—there are so many ways duplication can make your life easy.
1. Recurring Projects
A duplicate Notion workspace is the best blueprint for recurring projects. This is an absolute productivity hack when you’re handling similar projects one after the other.
Imagine having all your necessary templates ready, task lists, charts, and wikis, to use at your fingertips for every project. No more starting from scratch each time.
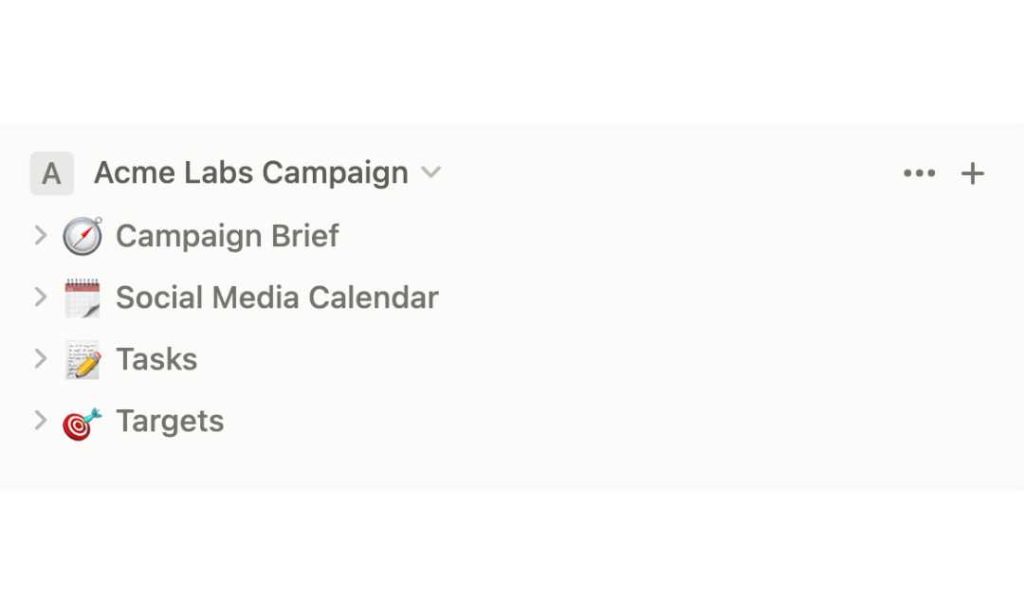
Let’s say you’re running marketing campaigns. Your campaign briefs, content calendars, KPIs, and more, are all set to be reused at a moment’s notice. It’s a practical, efficient approach to managing projects.
2. Training Sandbox
A duplicate workspace serves as a fantastic training playground. Remember when I mentioned using Notion to onboard new team members? I also share copies of my workspace with some of them.
By creating this safe space, I’m able to guide them through our systems without disrupting the main workspace. It’s an effective knowledge base to introduce workflows, templates, and tools, without the fear of mistakes impacting the live workspace.
They could explore, make edits, and get hands-on experience in a risk-free environment.
HOW-TO: Use Notion SOPs To Tighten Up Your Workflows
3. Consistent Branding
Here’s where it gets even better: duplicating a Notion workspace is an easy way to maintain consistent branding across teams, particularly beneficial for larger companies.
Create a “master” workspace, complete with your brand’s color schemes and styles. Every time a new workspace is duplicated, it inherits these branding elements. All team members can use this as their branding bible, promoting uniformity.
This method not only keeps your brand image consistent(1), but it also screams professionalism.
Duplicate Notion Workspace (6 Steps)
Alright, we’ve tackled the “why,” now let’s move into the “how” of duplicating your Notion workspace. In this section, I‘ll break down the process of duplicating your Notion workspace into manageable steps.
I’ll cover everything from finding your workspace, cloning it, inviting your team, to making sure all your pages made the jump.
Step 1: Find Workspace
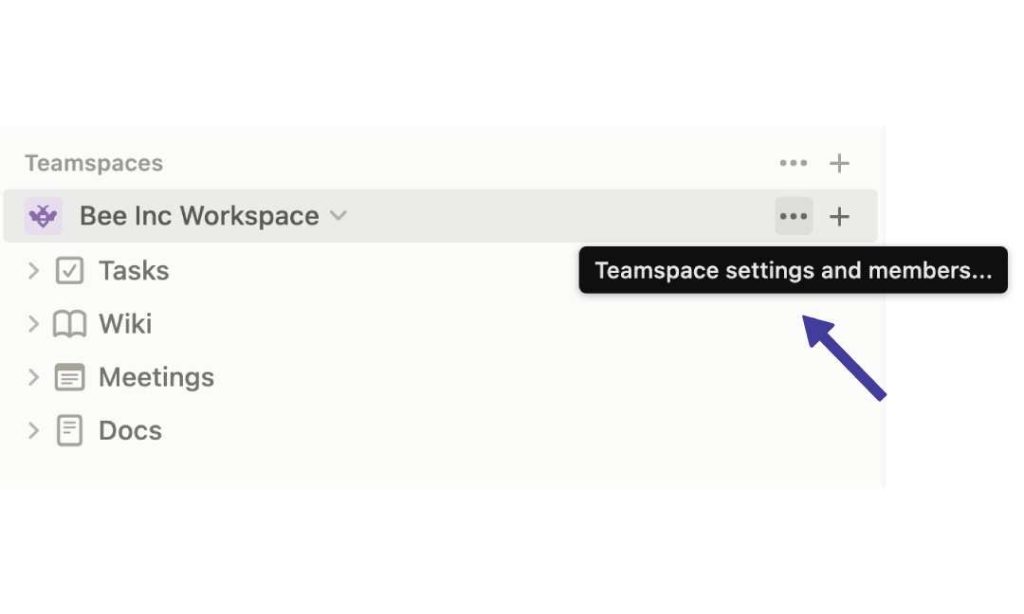
First things first, let’s locate the workspace you want to duplicate in Notion.
Simply head on over to the right sidebar. There, you’ll spot your workspace’s name. Hover over it, and you’ll notice three little dots (an ellipsis) appear. Go ahead, and click it.
Step 2: Duplicate Workspace
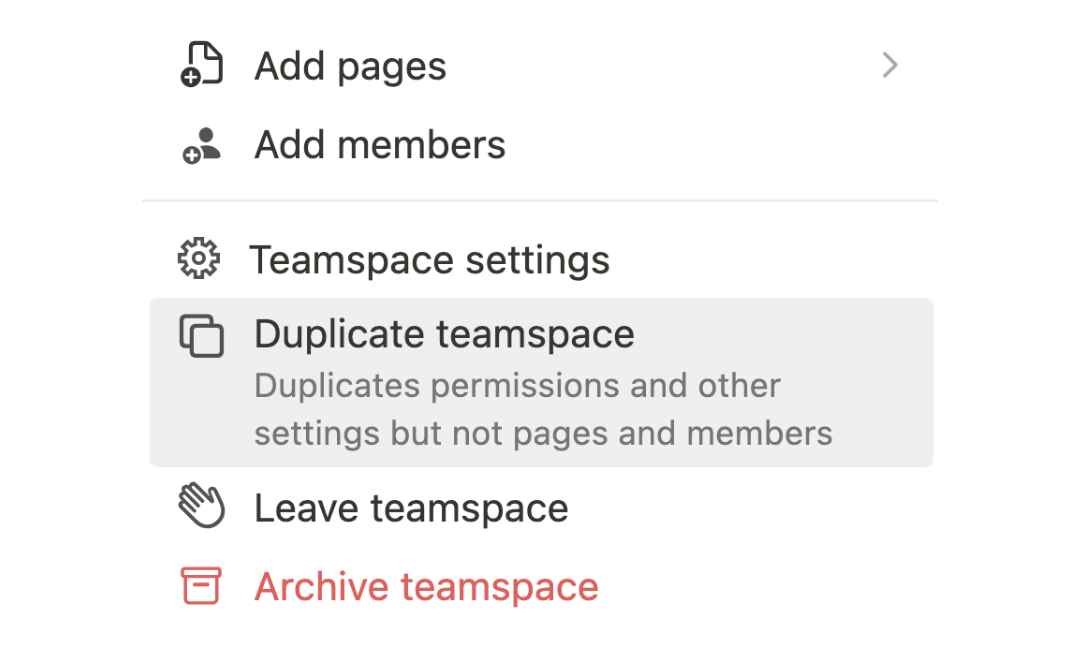
Now, let’s duplicate your workspace. When you click on the ‘three dots’ a menu with several options will appear. Click on ‘Duplicate Teamspace’ and clone your workspace.
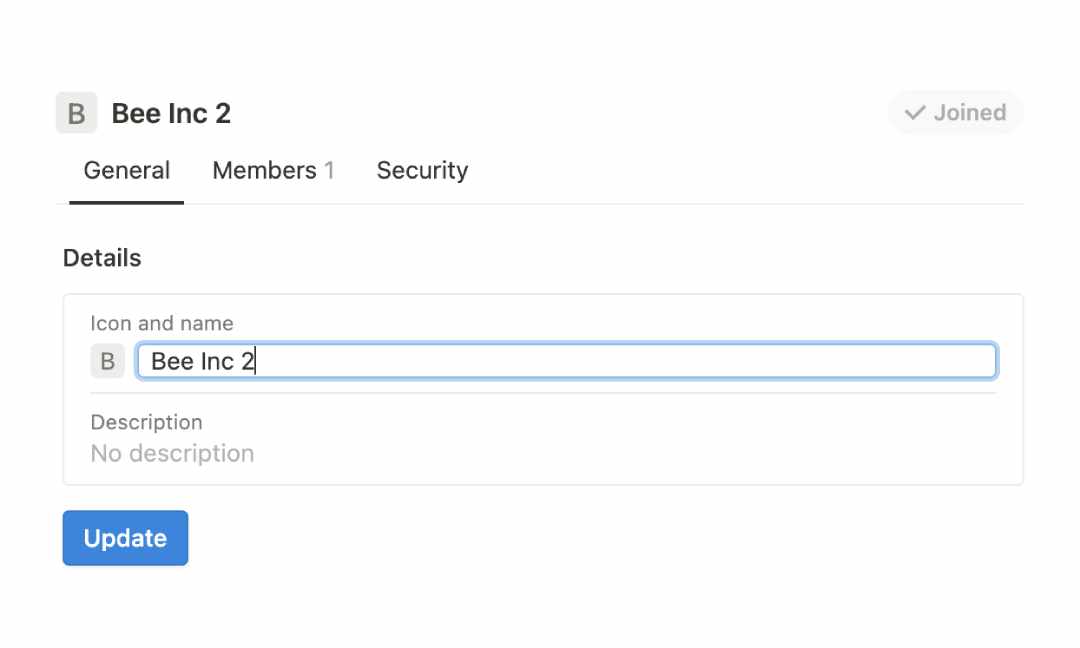
Give it a fresh name that reflects its purpose. If it’s project-based, provide project details in the workspace description. This makes it easy to identify later on.
Step 3: Add Members
Onto the fun part! Click on the “Members” tab and invite missing team members. Got external users who need access? No problem, you can invite them too.
And if there are members who aren’t involved in this project, feel free to streamline your team by removing them.
This is a great way to collaborate and share your workspace with those involved.
Step 4: Set Permissions
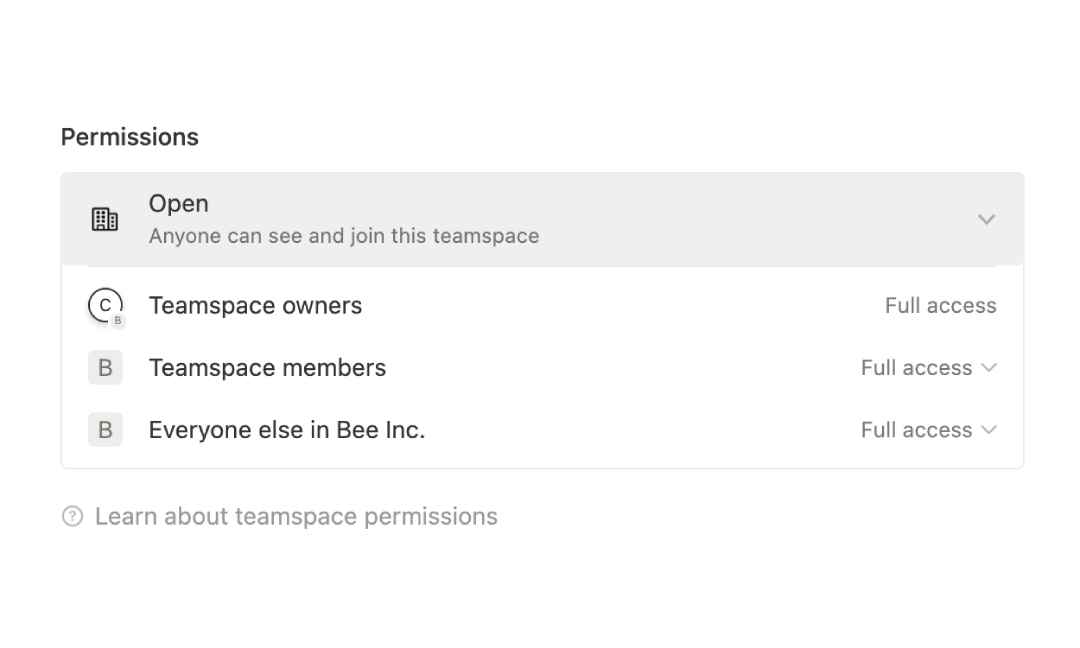
Great, your team is all here! Now, let’s talk about empowering them with the proper permissions.
You have four different sets to choose from. Take a moment to determine what level of access each team member requires. Each set offers different levels of control, so select what works best for your team dynamics.
Step 5: Add Pages
Moving onto step 5, we’re going to add pages to our workspace.
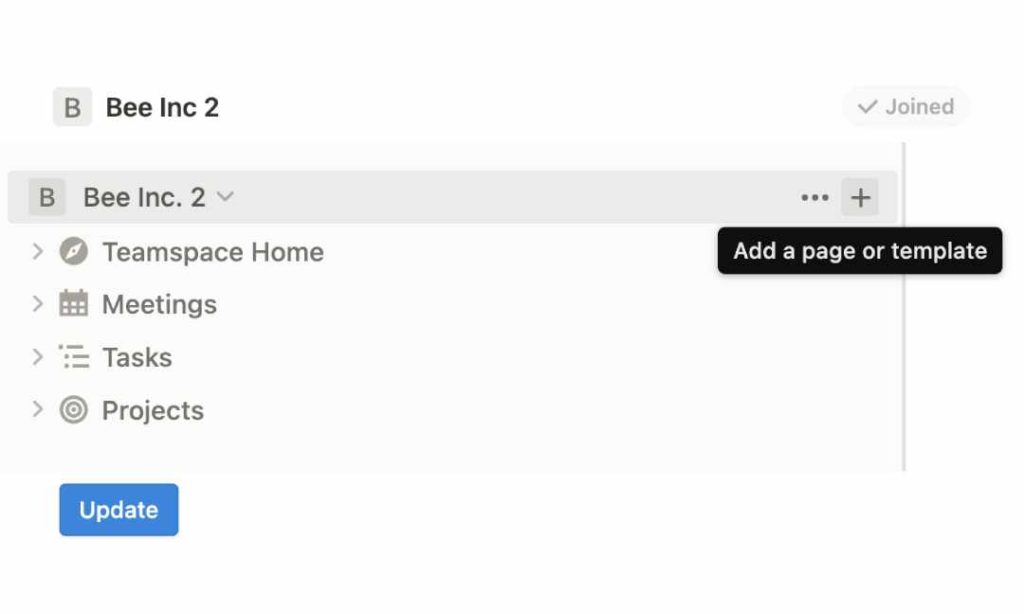
Remember the teamspace name you just created? Hover over it and spot the ‘+’ button? Tap on it to create a fresh page within the workspace.
While you’re there, double-check that all the pages from your original workspace have made the journey over to the duplicate one successfully.
Step 6: Check Workspace Settings
And now, the grand finale. It’s time for a final walkthrough of your new workspace, much like inspecting a new home before moving in.
Ensure everything is precisely where it should be and that everyone has the appropriate permissions. If it is, your cloned workspace is primed and ready for action!
When You Can’t Duplicate a Notion Workspace
Wondering why it’s impossible to duplicate a Notion workspace? It can seem a bit odd, especially since it’s such a straightforward process.
Here, I’ll walk through the reasons for this seeming roadblock and offer some insights.
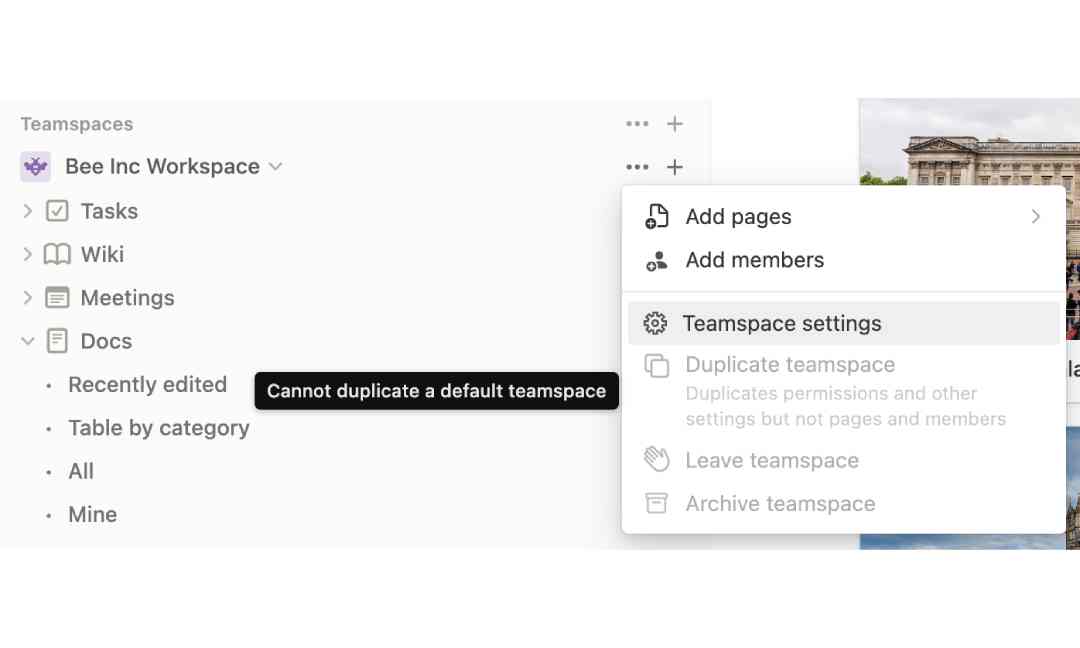
1. Default Teamspace
A default teamspace in Notion is a shared workspace where your team collaborates. Now, interestingly, you can’t duplicate these default teamspaces.
Why is that? It’s simply because Notion has designed the platform this way to ensure the integrity and security of the original content.
If you asked me, I’m a firm believer that users should have control over their content. So, while duplication might seem like a useful feature, it won’t work in this scenario.
2. Permissions
Another bump in the road to duplicating a Notion workspace could be not having the right permissions. If you’re not the boss or owner of the workspace, you’ll get a “no entry” sign.
As a rule, only Teamspace owners, who can access all pages, are allowed to clone workspaces. So if you’re itching to duplicate a workspace but can’t, your best bet is to have a chat with the workspace admin. They could probably help or even up your permissions!
3. Workspace Size Limits
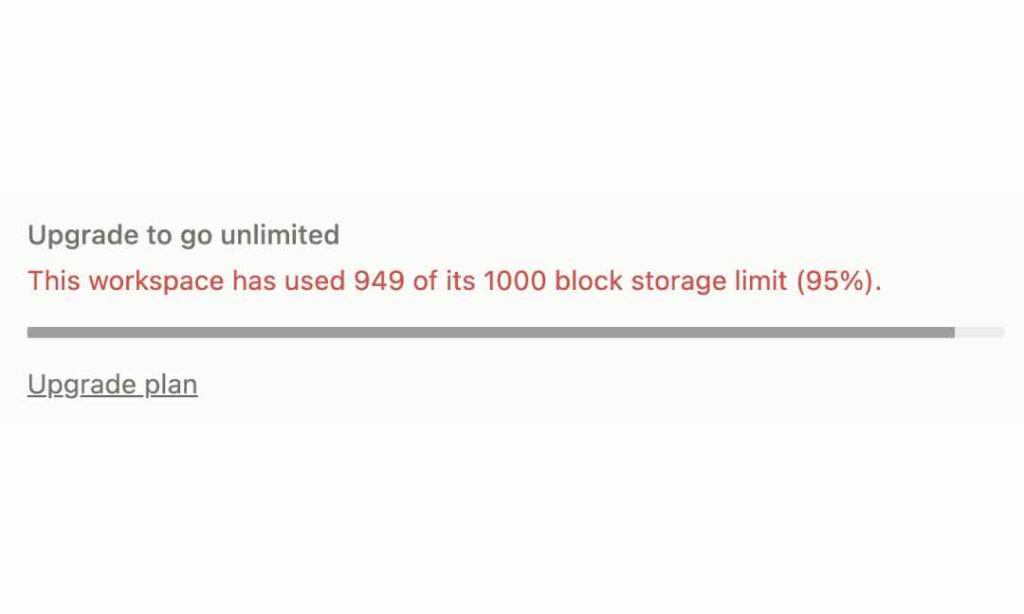
Here’s something I’ve experienced with Notion: sometimes, when your workspace becomes rather large, duplicating it becomes a challenge.
This typically happens when your workspace is chock-full of blocks, and you’ve maxed out your limit. It might look like a huge problem, but there are ways to tackle it!
You could give archiving or deleting some blocks a shot. Or, shelling out for a Notion plan upgrade could give you more wiggle room. Finding the best fit for you is the name of the game here.
4. Integrations
Here’s a less common, but crucial reason: workspace integrations.
If your Notion workspace is hooked up with external app APIs, cloning it won’t be a walk in the park. This is basically a security feature to keep your data safe and sound.
Even though it might feel like a snag, it’s all about keeping your workspace secure. So, when duplicating, remember that integrated apps won’t be copied too.
What Next After Duplicating Your Workspace?
Just duplicated your Notion workspace? Now, let’s make sure everything is exactly how you want it.
Sure, it might feel like a bit of a drag, but some steps are key. Here’s the lowdown on smart moves to make after cloning your workspace, from getting organized to double-checking permissions.
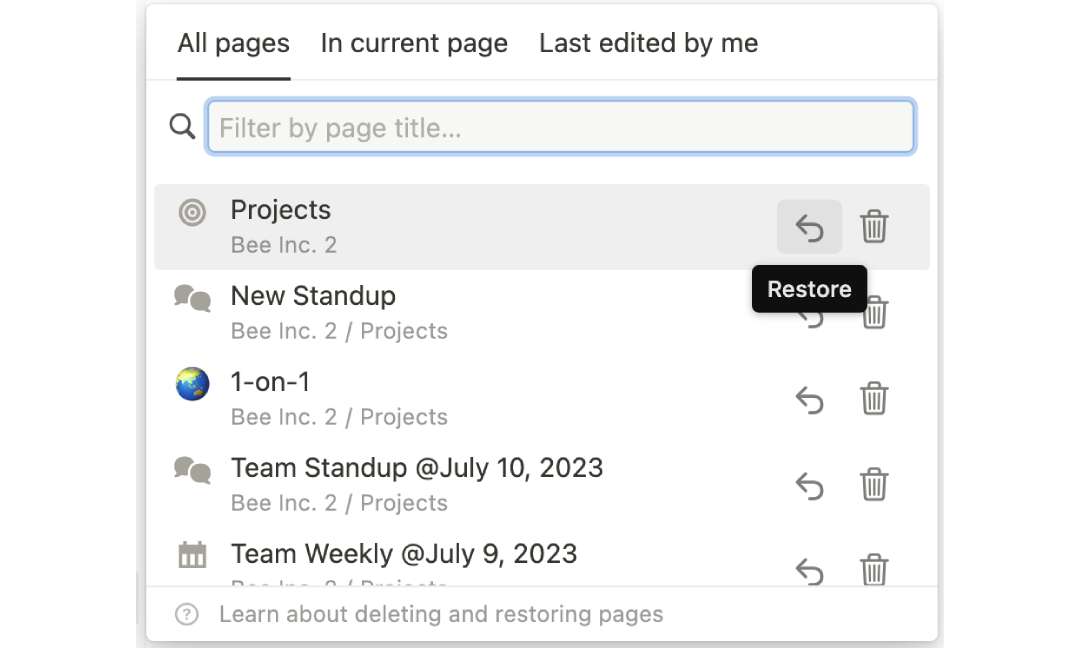
Check If Your Pages Are There
First up on the agenda? Make sure all your pages have been duplicated in your new Notion workspace.
Sometimes, especially with larger files, a few might slip through the cracks. Don’t panic! This could be a result of network issues, or perhaps you’ve maxed out your block limit.
In such cases, you might need to add these pages manually. Review your workspace carefully, ensuring no page is left behind.
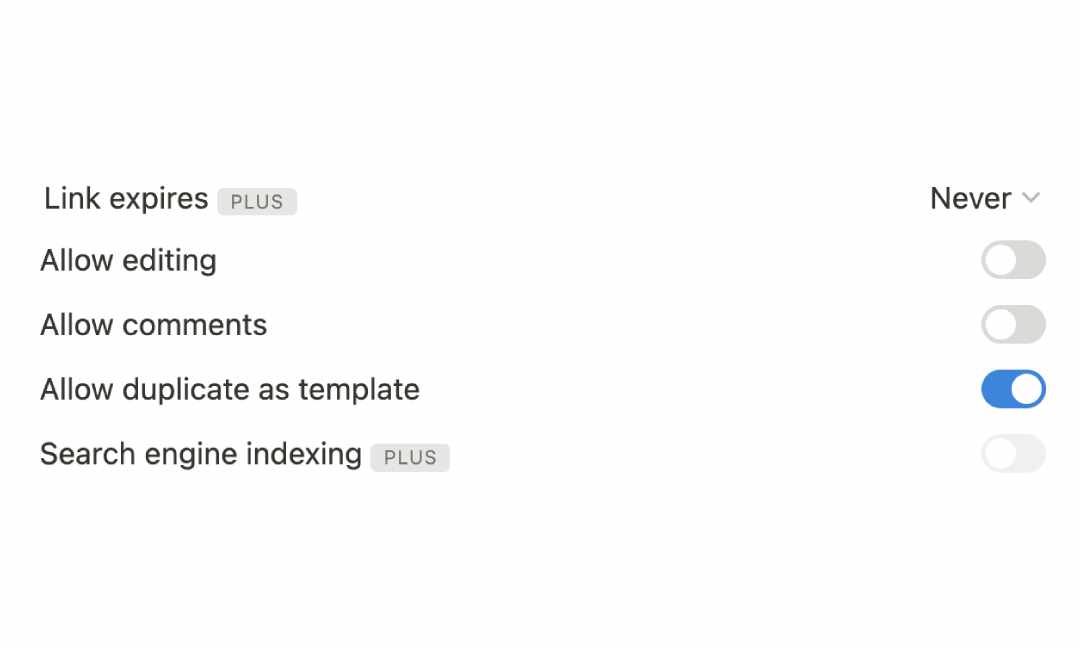
Don’t Gloss Over Security Settings
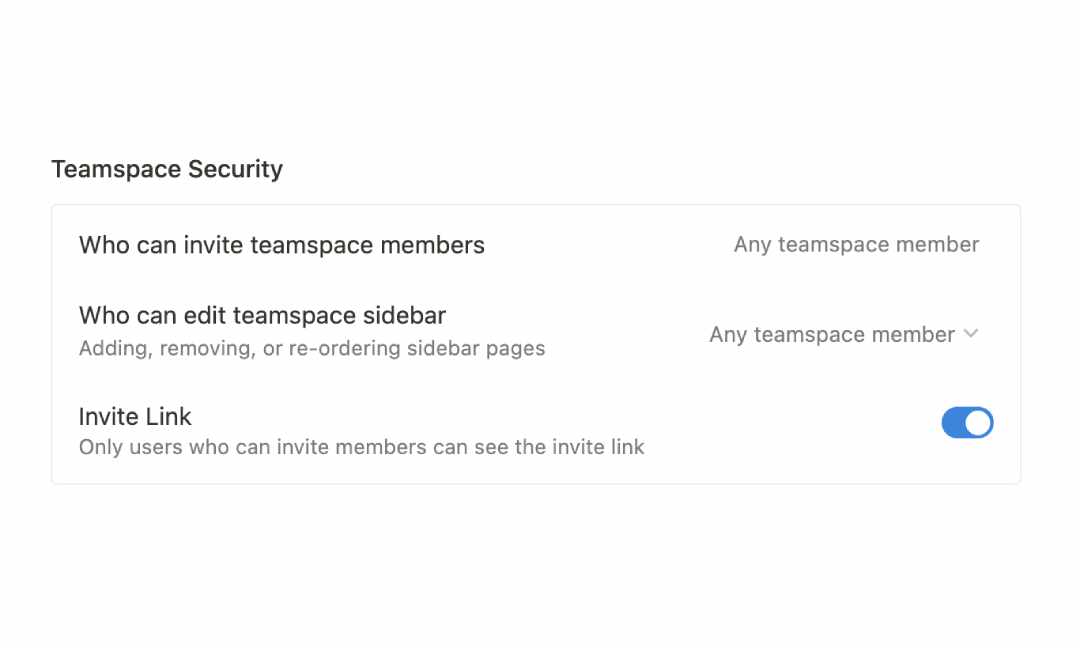
After duplicating your Notion workspace, ALWAYS check the security settings.
You see, some settings from your previous workspace could carry over to the new one. For instance, certain pages in your workspace may suddenly become public, which might not be what you want.
Or, certain members could inherit page exporting features they shouldn’t have access to. Always remember to review the security settings in your duplicated Notion workspace – it’s an essential step to ensure privacy and control!
Check Member Permissions
Here’s a biggie you might miss after cloning your Notion workspace: take a second look at member permissions.
I’ve tripped up on this one too, alright? You clone a workspace and oops! – you’ve given too much access.
When you’re working with clients, you need to make sure only the right people get in. You don’t want to share confidential info by accident!
Take a minute to double-check those member permissions in your duplicated workspace. It’s a small step that will save you a ton of professional cred.
Clean Up Unwanted Docs
My last tip is mostly housekeeping. After duplicating your Notion workspace, don’t forget to clean up.
Remove unwanted docs or unused templates. You know how sometimes your desk gets cluttered and it’s hard to find what you need? It’s the same with your Notion workspace.
And, these extras can eat up your block limits, and you might find yourself needing to upgrade sooner than planned.
So, keep it neat and tidy. Think of it as a little digital spring cleaning.
Wrapping It Up
So here’s the deal: a duplicate Notion workspace can make your life seriously easier.
It’s perfect for reusing project setups, training newbies, and keeping your brand on point across the board. With a few easy steps, you’ll have your fresh workspace up and running.
Just don’t forget to double-check who has access, keep your security tight, and ditch any stuff you don’t need.
Before writing an article, we carefully research each topic and only share information from reputable sources and trusted publications. Here is a list of the sources used in this article: